Wednesday, May 31, 2023

Traffic management approaches in computer network कंप्यूटर नेटवर्क में ट्रैफ़िक प्रबंधन के दृष्टिकोण

Traffic management approaches in computer networks are strategies and techniques used to control and optimize the flow of network traffic. These approaches help ensure efficient resource utilization, improve performance, and provide quality of service (QoS) for different types of network traffic. Here are some common traffic management approaches:-
कंप्यूटर नेटवर्क में ट्रैफ़िक प्रबंधन के दृष्टिकोण नेटवर्क ट्रैफ़िक के प्रवाह को नियंत्रित और अनुकूलित करने के लिए उपयोग की जाने वाली रणनीतियाँ और तकनीकें हैं। ये दृष्टिकोण कुशल संसाधन उपयोग सुनिश्चित करने, प्रदर्शन में सुधार करने और विभिन्न प्रकार के नेटवर्क ट्रैफ़िक के लिए सेवा की गुणवत्ता (QoS) प्रदान करने में मदद करते हैं। यहां कुछ सामान्य यातायात प्रबंधन दृष्टिकोण दिए गए हैं:-


1. Traffic Shaping: Traffic shaping regulates the rate of data transmission to smooth out bursts of traffic and maintain a consistent flow. It buffers and delays packets, allowing them to be transmitted at a controlled rate. This approach helps prevent network congestion and ensures fair sharing of network resources.
1. ट्रैफिक शेपिंग: ट्रैफिक शेपिंग ट्रैफिक के फटने को सुचारू करने और एक सुसंगत प्रवाह बनाए रखने के लिए डेटा ट्रांसमिशन की दर को नियंत्रित करता है। यह बफ़र करता है और पैकेट में देरी करता है, जिससे उन्हें नियंत्रित दर पर प्रसारित किया जा सकता है। यह दृष्टिकोण नेटवर्क की भीड़ को रोकने में मदद करता है और नेटवर्क संसाधनों का उचित साझाकरण सुनिश्चित करता है।

2. Quality of Service (QoS): QoS mechanisms prioritize specific types of network traffic based on their importance or requirements. By assigning different levels of service to different traffic classes, QoS ensures that critical applications or real-time services receive the necessary resources, such as bandwidth, latency, or packet loss, to meet their performance needs.
2. सेवा की गुणवत्ता (QoS): QoS तंत्र विशिष्ट प्रकार के नेटवर्क ट्रैफ़िक को उनके महत्व या आवश्यकताओं के आधार पर प्राथमिकता देते हैं। विभिन्न ट्रैफ़िक वर्गों को सेवा के विभिन्न स्तरों को निर्दिष्ट करके, QoS यह सुनिश्चित करता है कि महत्वपूर्ण एप्लिकेशन या रीयल-टाइम सेवाएं आवश्यक संसाधन प्राप्त करें, जैसे कि बैंडविड्थ, विलंबता, या पैकेट हानि, उनकी प्रदर्शन आवश्यकताओं को पूरा करने के लिए।

3. Traffic Policing: Traffic policing monitors and enforces compliance with defined traffic rules and policies. It regulates the rate of incoming or outgoing traffic and discards packets that exceed specified limits. Policing helps control excessive traffic and prevents network congestion.
3. यातायात पुलिस: यातायात पुलिस परिभाषित यातायात नियमों और नीतियों के अनुपालन की निगरानी करती है और उन्हें लागू करती है। यह इनकमिंग या आउटगोइंग ट्रैफिक की दर को नियंत्रित करता है और निर्दिष्ट सीमा से अधिक पैकेट को हटा देता है। पुलिस अत्यधिक यातायात को नियंत्रित करने में मदद करती है और नेटवर्क की भीड़ को रोकती है।

4. Traffic Engineering: Traffic engineering involves the optimization of network paths, link utilization, and resource allocation to improve overall network performance. It uses routing protocols and algorithms to dynamically distribute traffic, avoid congestion hotspots, and balance load across network links.
4. ट्रैफिक इंजीनियरिंग: ट्रैफिक इंजीनियरिंग में समग्र नेटवर्क प्रदर्शन को बेहतर बनाने के लिए नेटवर्क पथों का अनुकूलन, लिंक उपयोग और संसाधन आवंटन शामिल है। यह रूटिंग प्रोटोकॉल और एल्गोरिदम का उपयोग ट्रैफ़िक को गतिशील रूप से वितरित करने, कंजेशन हॉटस्पॉट से बचने और नेटवर्क लिंक पर भार को संतुलित करने के लिए करता है।


5. Congestion Control: Congestion control mechanisms aim to detect and manage network congestion. They employ techniques such as congestion notification, flow control, and congestion avoidance algorithms to prevent excessive traffic and mitigate congestion-related issues, such as packet loss and increased latency.
5. कंजेशन कंट्रोल: कंजेशन कंट्रोल मैकेनिज्म का उद्देश्य नेटवर्क कंजेशन का पता लगाना और उसका प्रबंधन करना है। वे अत्यधिक ट्रैफ़िक को रोकने और भीड़ से संबंधित मुद्दों को कम करने के लिए भीड़ अधिसूचना, प्रवाह नियंत्रण और भीड़ से बचाव एल्गोरिदम जैसी तकनीकों को नियोजित करते हैं, जैसे पैकेट हानि और बढ़ी हुई विलंबता।

6. Load Balancing: Load balancing distributes network traffic across multiple paths or resources to optimize resource utilization and improve performance. It evenly distributes traffic based on factors such as link capacity, traffic load, or proximity to destinations. Load balancing can be performed at different levels, including DNS load balancing, server load balancing, or link load balancing.
6. लोड बैलेंसिंग: लोड बैलेंसिंग संसाधन उपयोग को अनुकूलित करने और प्रदर्शन में सुधार करने के लिए नेटवर्क ट्रैफ़िक को कई रास्तों या संसाधनों में वितरित करता है। यह समान रूप से लिंक क्षमता, ट्रैफ़िक लोड या गंतव्यों से निकटता जैसे कारकों के आधार पर ट्रैफ़िक वितरित करता है। लोड संतुलन विभिन्न स्तरों पर किया जा सकता है, जिसमें डीएनएस लोड संतुलन, सर्वर लोड संतुलन या लिंक लोड संतुलन शामिल है।

7. Packet Classification and Prioritization: Packet classification involves identifying and categorizing packets based on specific criteria, such as protocol type, source/destination IP address, port numbers, or application. Prioritization assigns different priorities or service levels to different packet classes, ensuring that critical or time-sensitive traffic is given higher precedence.
7. पैकेट वर्गीकरण और प्राथमिकता: पैकेट वर्गीकरण में प्रोटोकॉल प्रकार, स्रोत/गंतव्य आईपी पता, पोर्ट नंबर या एप्लिकेशन जैसे विशिष्ट मानदंडों के आधार पर पैकेट की पहचान और वर्गीकरण शामिल है। प्राथमिकताकरण अलग-अलग पैकेट वर्गों को अलग-अलग प्राथमिकताएं या सेवा स्तर प्रदान करता है, यह सुनिश्चित करता है कि महत्वपूर्ण या समय-संवेदनशील यातायात को उच्च प्राथमिकता दी जाती है।

8. Bandwidth Management: Bandwidth management techniques allocate and control the amount of bandwidth available to different applications or users. They use mechanisms like bandwidth reservation, rate limiting, or bandwidth allocation policies to allocate and regulate bandwidth resources effectively.
8. बैंडविड्थ प्रबंधन: बैंडविड्थ प्रबंधन तकनीक विभिन्न अनुप्रयोगों या उपयोगकर्ताओं के लिए उपलब्ध बैंडविड्थ की मात्रा को आवंटित और नियंत्रित करती है। वे बैंडविड्थ संसाधनों को प्रभावी ढंग से आवंटित और विनियमित करने के लिए बैंडविड्थ आरक्षण, दर सीमित करने, या बैंडविड्थ आवंटन नीतियों जैसे तंत्र का उपयोग करते हैं।

These traffic management approaches can be implemented through various network devices, such as routers, switches, firewalls, or specialized traffic management equipment. The choice and combination of these approaches depend on the specific network requirements, application needs, and desired network performance goals.
ये ट्रैफ़िक प्रबंधन दृष्टिकोण विभिन्न नेटवर्क उपकरणों, जैसे राउटर, स्विच, फायरवॉल या विशेष ट्रैफ़िक प्रबंधन उपकरण के माध्यम से लागू किए जा सकते हैं। इन दृष्टिकोणों का चुनाव और संयोजन विशिष्ट नेटवर्क आवश्यकताओं, अनुप्रयोग आवश्यकताओं और वांछित नेटवर्क प्रदर्शन लक्ष्यों पर निर्भर करता है।

Tuesday, May 23, 2023

DTP imp vocational subject i year davv indore

Unit-01
Block diagram of computer
Generations of computer
Word processing,
Ms excel introduction
Difference between system software and apllication software

Unit-02
Page maker intro
Photoshop intro
Drawing tools of page maker
Different layers in photoshop

Unit-03
Coral draw intro
Colors basics rgb and cmyk
Making greeting cards wedding cards, posters etc

Digital Marketing Imp vocational subject I Year davv indore nep 2020

Unit-01
Digital marketing intro,
Ecommerce and its typea b2b, b2c, c2b,c2c etc
Difference between portal and website
Visitors engagement
Swot analysis

Unit-02
Seo introduction, smo introduction,
Facebook , twitter, blog marketing

Unit-03
Pay per click
Google adwords
Email marketing
Affiliate marketing basics
Advertisement.

Monday, May 22, 2023

Epravesh 2023-24 UG and PG Admission Schedule (Time Table) प्रवेश प्रक्रिया ई प्रवेश सत्र 2023-24

Web Designing Important Questions DAVV Indore NEP 2020

Web Designing important topics
1) short note - internet, www, webserver webbrowser web page, URL, Domain Name

2) html introduction, any 5 basic tags5 <hn> <a> <b> <i> <u> <img><font>, lists <dl> <ol> <ul>, table tag<table> <th> <td> <tr>, frame tag <frameset> <frame>, form tag <input> <textarea> <submit> <reset>, xhtml dynamic website

3) <script>, <link> CSS Intro, <meta>, <span>, <div>, css  background cursor, css text, font style

4) css box model, css positioning 

5) java script introduction, operators, array, java script loops, java script functions, 
Popup boxes- prompt box etc, checking and validating fields of forms with java script.

Wednesday, May 17, 2023

Distance vector routing with example, डिस्टेंस वेक्टर रूटिंग उदाहरण सहित

Distance vector routing is a decentralized routing algorithm where each node maintains a table that contains the distance to all known destinations and the next hop to reach them. Nodes exchange routing information with their immediate neighbors, and based on the received information, they update their routing tables. This process continues iteratively until convergence is reached.
डिस्टेंस वेक्टर रूटिंग एक विकेन्द्रीकृत रूटिंग एल्गोरिथम है जहां प्रत्येक नोड एक टेबल रखता है जिसमें सभी ज्ञात गंतव्यों की दूरी और उन तक पहुंचने के लिए अगला हॉप होता है। नोड्स अपने निकटतम पड़ोसियों के साथ रूटिंग सूचनाओं का आदान-प्रदान करते हैं, और प्राप्त सूचनाओं के आधार पर, वे अपने रूटिंग टेबल को अपडेट करते हैं। यह प्रक्रिया तब तक चलती रहती है जब तक अभिसरण नहीं हो जाता।

Let's illustrate distance vector routing with a simple example. Consider the following network topology:-
आइए एक सरल उदाहरण के साथ दूरी वेक्टर रूटिंग को समझाते हैं। निम्नलिखित नेटवर्क टोपोलॉजी पर विचार करें:-

       A

     /   \

 2/        \3

 /             \

B-----1----C

  \            /

  4\       /1

      \  /

       D


In this example, A, B, C, and D are the nodes in the network, and the numbers on the links represent the cost associated with each link.Initially, each node starts with its own routing table:

इस उदाहरण में, ए, बी, सी, और डी नेटवर्क में नोड हैं, और लिंक पर संख्या प्रत्येक लिंक से जुड़ी लागत का प्रतिनिधित्व करती है। प्रारंभ में, प्रत्येक नोड अपनी रूटिंग टेबल से शुरू होता है:

Node A:

Destination | Next Hop | Distance

-------------------------------

A           |   -      |   0

B           |   -      | inf

C           |   -      | inf

D           |   -      | inf


Node B:

Destination | Next Hop | Distance

-------------------------------

A           |   -      | inf

B           |   -      |   0

C           |   -      | inf

D           |   -      | inf


Node C:

Destination | Next Hop | Distance

-------------------------------

A           |   -      | inf

B           |   -      | inf

C           |   -      |   0

D           |   -      | inf


Node D:

Destination | Next Hop | Distance

-------------------------------

A           |   -      | inf

B           |   -      | inf

C           |   -      | inf

D           |   -      |   0


The distance values are initially set to infinity for all destinations except for the node's own address.
नोड के अपने पते को छोड़कर सभी गंतव्यों के लिए दूरी मान प्रारंभ में अनंत पर सेट होते हैं।

Now, let's go through the iterative process of exchanging routing information and updating the routing tables:-
अब, रूटिंग जानकारी के आदान-प्रदान और रूटिंग टेबल को अपडेट करने की पुनरावृत्त प्रक्रिया से गुजरते हैं:-

1. Node A sends its routing table to its neighbors B and C. Node A informs its neighbors that it can reach B with a cost of 2 and C with a cost of 3.
1. नोड ए अपने रूटिंग टेबल को अपने पड़ोसियों बी और सी को भेजता है। नोड ए अपने पड़ोसियों को सूचित करता है कि वह 2 की लागत के साथ बी और 3 की लागत के साथ सी तक पहुंच सकता है।

2. Node B receives the routing information from Node A and updates its routing table accordingly. It learns that it can reach A via Node A with a cost of 2.
2. नोड बी नोड ए से रूटिंग जानकारी प्राप्त करता है और तदनुसार अपनी रूटिंग टेबल अपडेट करता है। यह सीखता है कि यह 2 की लागत के साथ नोड ए के माध्यम से ए तक पहुंच सकता है।


Node B:

Destination | Next Hop | Distance

-------------------------------

A           |   A      |   2

B           |   -      |   0

C           |   -      | inf

D           |   -      | inf


3. Node B sends its routing table to its neighbors A and D. Node B informs its neighbors that it can reach A with a cost of 2 and D with a cost of 4.
3. नोड बी अपनी राउटिंग टेबल अपने पड़ोसियों ए और डी को भेजता है। नोड बी अपने पड़ोसियों को सूचित करता है कि वह 2 की लागत के साथ ए और 4 की लागत के साथ डी तक पहुंच सकता है।

4. Node A receives the routing information from Node B and updates its routing table accordingly. It learns that it can reach D via Node B with a cost of 4.
4. नोड A, नोड B से रूटिंग जानकारी प्राप्त करता है और तदनुसार अपनी रूटिंग टेबल को अपडेट करता है। यह सीखता है कि यह 4 की लागत के साथ नोड बी के माध्यम से डी तक पहुंच सकता है।

Node A:

Destination | Next Hop | Distance

-------------------------------

A           |   -      |   0

B           |   A      |   2

C           |   -      | inf

D           |   B      |   6


5. Node A sends its updated routing table to Node C.
5. नोड ए अपनी अद्यतन रूटिंग तालिका नोड सी को भेजता है।

6. Node C receives the routing information from Node A and updates its routing table accordingly. It learns that it can reach B via Node A with a cost of 2 and D via Node B with a cost of 6.
6. नोड सी नोड ए से रूटिंग जानकारी प्राप्त करता है और तदनुसार इसकी रूटिंग तालिका अपडेट करता है। यह सीखता है कि यह 2 की लागत के साथ नोड ए के माध्यम से बी तक पहुंच सकता है और 6 की लागत के साथ नोड बी के माध्यम से डी तक पहुंच सकता है।

Node C:

Destination | Next Hop | Distance

-------------------------------

A           |   A      |   3

B           |   A      |   2

C           |   -      |   0

D           |   B      |   6


7. Node C sends its updated routing table to Node A and Node D.
7. नोड सी अपनी अद्यतन रूटिंग टेबल को नोड ए और नोड डी को भेजता है।

8. Node D receives the routing information from Node C and updates its routing table accordingly. It learns that it can reach A via Node B with a cost of 6.
8. नोड डी, नोड सी से रूटिंग जानकारी प्राप्त करता है और तदनुसार अपनी रूटिंग टेबल को अपडेट करता है। यह सीखता है कि यह 6 की लागत के साथ नोड बी के माध्यम से ए तक पहुंच सकता है।


Node D:

Destination | Next Hop | Distance

-------------------------------

A           |   B      |   6

B           |   -      | inf

C           |   -      | inf

D           |   -      |   0


9. Node D sends its routing table to its neighbor B.
9. नोड डी अपनी रूटिंग टेबल अपने पड़ोसी बी को भेजता है।

10. Node B receives the routing information from Node D and updates its routing table accordingly. It learns that it can reach A via Node D with a cost of 6.
10. नोड बी, नोड डी से रूटिंग जानकारी प्राप्त करता है और तदनुसार अपनी रूटिंग टेबल को अपडेट करता है। यह सीखता है कि यह 6 की लागत के साथ नोड डी के माध्यम से ए तक पहुंच सकता है।

Node B:

Destination | Next Hop | Distance

-------------------------------

A           |   D      |   6

B           |   -      |   0

C           |   -      | inf

D           |   -      | inf


11. Node B sends its updated routing table to Node A.
11. नोड बी अपनी अद्यतन रूटिंग तालिका नोड ए को भेजता है।

12. After the exchange of routing information, no further changes occur in the routing tables. The algorithm has converged, and each node has learned the optimal paths to reach different destinations in the network.
12. रूटिंग सूचनाओं के आदान-प्रदान के बाद, रूटिंग टेबल में कोई और परिवर्तन नहीं होता है। एल्गोरिथ्म अभिसरण हो गया है, और प्रत्येक नोड ने नेटवर्क में विभिन्न गंतव्यों तक पहुंचने के लिए इष्टतम पथ सीख लिया है।

This is a simplified example of distance vector routing, demonstrating how nodes exchange routing information and update their routing tables iteratively until convergence. In practice, distance vector routing algorithms incorporate additional mechanisms to handle more complex network topologies, handle changes in link costs, and prevent routing loops.
यह डिस्टेंस वेक्टर रूटिंग का एक सरलीकृत उदाहरण है, यह प्रदर्शित करता है कि कैसे नोड्स रूटिंग सूचनाओं का आदान-प्रदान करते हैं और अभिसरण तक अपनी रूटिंग टेबल को पुनरावृत्त रूप से अपडेट करते हैं। व्यवहार में, दूरी वेक्टर रूटिंग एल्गोरिदम में अधिक जटिल नेटवर्क टोपोलॉजी को संभालने के लिए अतिरिक्त तंत्र शामिल होते हैं, लिंक लागत में बदलाव को संभालते हैं, और रूटिंग लूप को रोकते हैं।

DTP II Year, Unit 3, Vocational Course, NEP 2020, DAVV Indore , Higher education MP


Creating PDF files with Acrobat:-

Creating PDF files with Acrobat is a straightforward process. Adobe Acrobat is a popular software application that allows you to create, edit, and manage PDF documents. Here are the general steps to create a PDF file using Acrobat:

1. Launch Adobe Acrobat: Open the Adobe Acrobat application on your computer. If you don't have Acrobat installed, you can download and install it from the Adobe website.

2. Open a document: Click on the "File" menu and select "Open" to open the document you want to convert to a PDF file. Acrobat supports various file formats such as Word documents, Excel spreadsheets, PowerPoint presentations, image files, and more.

3. Create PDF: Once your document is open, go to the "File" menu and choose the "Save As" or "Export To" option. In the dialog box that appears, select "Adobe PDF" as the file format.

4. Configure PDF settings: Depending on your preferences, you can configure various settings for the PDF file. This includes options like file name, location, security settings, compatibility, optimization, and more. You can choose the appropriate settings based on your needs.

5. Save the PDF: After configuring the settings, click on the "Save" button to create the PDF file. Acrobat will convert the document into a PDF format and save it to the specified location.

6. Review the PDF: Once the PDF is created, open it in Adobe Acrobat to review the document and ensure that the conversion process was successful. You can navigate through the PDF, zoom in or out, add annotations, and perform other editing functions if needed.

7. Further editing: If you need to make any changes to the PDF file, you can use the editing tools available in Adobe Acrobat. These tools allow you to modify text, add or remove pages, insert images, apply watermarks, and more.

8. Save and share: After making any necessary edits, save the changes and share the PDF file as required. You can send it via email, upload it to a website, or share it through other means.

एक्रोबैट के साथ पीडीएफ फाइल बनाना एक सीधी प्रक्रिया है। Adobe Acrobat एक लोकप्रिय सॉफ़्टवेयर एप्लिकेशन है जो आपको PDF दस्तावेज़ बनाने, संपादित करने और प्रबंधित करने की अनुमति देता है। एक्रोबैट का उपयोग करके पीडीएफ फाइल बनाने के सामान्य चरण यहां दिए गए हैं:

1. Adobe Acrobat लॉन्च करें: अपने कंप्यूटर पर Adobe Acrobat एप्लिकेशन खोलें। यदि आपके पास एक्रोबैट इंस्टॉल नहीं है, तो आप इसे एडोब वेबसाइट से डाउनलोड और इंस्टॉल कर सकते हैं।

2. एक दस्तावेज़ खोलें: "फ़ाइल" मेनू पर क्लिक करें और उस दस्तावेज़ को खोलने के लिए "खोलें" चुनें जिसे आप पीडीएफ फ़ाइल में बदलना चाहते हैं। एक्रोबैट विभिन्न फ़ाइल स्वरूपों का समर्थन करता है जैसे कि वर्ड दस्तावेज़, एक्सेल स्प्रेडशीट, पॉवरपॉइंट प्रस्तुतियाँ, छवि फ़ाइलें, और बहुत कुछ।

3. पीडीएफ बनाएं: एक बार जब आपका दस्तावेज़ खुल जाए, तो "फ़ाइल" मेनू पर जाएं और "इस रूप में सहेजें" या "निर्यात करें" विकल्प चुनें। दिखाई देने वाले संवाद बॉक्स में, फ़ाइल स्वरूप के रूप में "Adobe PDF" चुनें।

4. पीडीएफ सेटिंग्स कॉन्फ़िगर करें: आपकी प्राथमिकताओं के आधार पर, आप पीडीएफ फाइल के लिए विभिन्न सेटिंग्स कॉन्फ़िगर कर सकते हैं। इसमें फ़ाइल का नाम, स्थान, सुरक्षा सेटिंग्स, अनुकूलता, अनुकूलन, और बहुत कुछ जैसे विकल्प शामिल हैं। आप अपनी आवश्यकताओं के आधार पर उपयुक्त सेटिंग्स चुन सकते हैं।

5. पीडीएफ को सेव करें: सेटिंग्स को कॉन्फ़िगर करने के बाद, पीडीएफ फाइल बनाने के लिए "सेव" बटन पर क्लिक करें। एक्रोबैट दस्तावेज़ को एक पीडीएफ प्रारूप में बदल देगा और इसे निर्दिष्ट स्थान पर सहेज देगा।

6. पीडीएफ की समीक्षा करें: एक बार पीडीएफ बनने के बाद, दस्तावेज़ की समीक्षा करने के लिए इसे एडोब एक्रोबैट में खोलें और सुनिश्चित करें कि रूपांतरण प्रक्रिया सफल रही। आप पीडीएफ के माध्यम से नेविगेट कर सकते हैं, ज़ूम इन या आउट कर सकते हैं, एनोटेशन जोड़ सकते हैं और यदि आवश्यक हो तो अन्य संपादन कार्य कर सकते हैं।

7. आगे का संपादन: यदि आपको पीडीएफ फाइल में कोई बदलाव करने की आवश्यकता है, तो आप एडोब एक्रोबैट में उपलब्ध संपादन टूल का उपयोग कर सकते हैं। ये उपकरण आपको पाठ को संशोधित करने, पृष्ठों को जोड़ने या हटाने, चित्र सम्मिलित करने, वॉटरमार्क लगाने, और बहुत कुछ करने की अनुमति देते हैं।

8. सहेजें और साझा करें: आवश्यक संपादन करने के बाद, परिवर्तनों को सहेजें और आवश्यकतानुसार पीडीएफ फाइल को साझा करें। आप इसे ईमेल के माध्यम से भेज सकते हैं, इसे वेबसाइट पर अपलोड कर सकते हैं, या इसे अन्य माध्यमों से साझा कर सकते हैं।


Create an Adobe Acrobat file:- 

To create an Adobe Acrobat file, you can follow these steps:

1. Install Adobe Acrobat: If you don't have Adobe Acrobat installed on your computer, you will need to download and install it from the Adobe website. There may be a cost associated with acquiring the software, as it is a commercial product.

2. Open Adobe Acrobat: Once Adobe Acrobat is installed, launch the application by double-clicking its icon on your desktop or finding it in your list of installed programs.

3. Create a new document: In Adobe Acrobat, go to the "File" menu and choose "Create." From the drop-down menu, select the type of file you want to create. Adobe Acrobat allows you to create various types of documents such as PDF, PDF Portfolio, PDF from Web Page, PDF from Scanner, and more.

4. Configure document settings: Depending on the type of document you choose to create, you may be presented with different options and settings. For example, if you select "PDF," you can choose a blank page or import a file as the basis for your document. You can also specify the page size, orientation, and other settings.

5. Design the document: Once the new document is created, you can start designing its contents. Use the editing tools in Adobe Acrobat to add text, images, shapes, or interactive elements to your document. You can also format the text, adjust the layout, and customize the appearance according to your needs.

6. Save the document: After designing your document, go to the "File" menu and select "Save" or "Save As" to save your file. Choose the desired location on your computer and provide a name for the document. Adobe Acrobat allows you to save your file in the PDF format, which is the default file format for Acrobat.

7. Review and edit: Open the saved document in Adobe Acrobat to review the content and formatting. If you need to make any changes, use the editing tools in Acrobat to modify the document as required.

8. Share the document: Once you are satisfied with the document, you can share it with others. You can send the file via email, upload it to a website or cloud storage service, or share it through other means. Recipients can open and view the Adobe Acrobat file using Adobe Acrobat Reader or other PDF viewer software. 
Remember to save your work periodically as you create and edit the document to avoid losing any changes.

Adobe Acrobat फ़ाइल बनाएँ:-

Adobe Acrobat फ़ाइल बनाने के लिए, आप इन चरणों का पालन कर सकते हैं:

1. Adobe Acrobat इंस्टॉल करें: यदि आपके कंप्यूटर पर Adobe Acrobat इंस्टॉल नहीं है, तो आपको इसे Adobe वेबसाइट से डाउनलोड और इंस्टॉल करना होगा। सॉफ़्टवेयर प्राप्त करने से जुड़ी लागत हो सकती है, क्योंकि यह एक व्यावसायिक उत्पाद है।

2. Adobe Acrobat खोलें: एक बार Adobe Acrobat इंस्टॉल हो जाने के बाद, अपने डेस्कटॉप पर इसके आइकन पर डबल-क्लिक करके या इसे अपने इंस्टॉल किए गए प्रोग्रामों की सूची में ढूंढकर एप्लिकेशन लॉन्च करें।

3. एक नया दस्तावेज़ बनाएँ: Adobe Acrobat में, "फ़ाइल" मेनू पर जाएँ और "बनाएँ" चुनें। ड्रॉप-डाउन मेनू से, वह फ़ाइल प्रकार चुनें जिसे आप बनाना चाहते हैं। Adobe Acrobat आपको विभिन्न प्रकार के दस्तावेज़ बनाने की अनुमति देता है जैसे PDF, PDF पोर्टफोलियो, वेब पेज से PDF, स्कैनर से PDF, और बहुत कुछ।

4. दस्तावेज़ सेटिंग्स कॉन्फ़िगर करें: आपके द्वारा बनाए जाने वाले दस्तावेज़ के प्रकार के आधार पर, आपको विभिन्न विकल्पों और सेटिंग्स के साथ प्रस्तुत किया जा सकता है। उदाहरण के लिए, यदि आप "पीडीएफ" चुनते हैं, तो आप अपने दस्तावेज़ के आधार के रूप में एक खाली पृष्ठ चुन सकते हैं या फ़ाइल आयात कर सकते हैं। आप पृष्ठ आकार, ओरिएंटेशन और अन्य सेटिंग्स भी निर्दिष्ट कर सकते हैं।

5. दस्तावेज़ को डिज़ाइन करें: एक बार नया दस्तावेज़ बन जाने के बाद, आप इसकी सामग्री को डिज़ाइन करना शुरू कर सकते हैं। अपने दस्तावेज़ में पाठ, चित्र, आकार या इंटरैक्टिव तत्व जोड़ने के लिए Adobe Acrobat में संपादन टूल का उपयोग करें। आप पाठ को प्रारूपित भी कर सकते हैं, लेआउट को समायोजित कर सकते हैं और अपनी आवश्यकताओं के अनुसार उपस्थिति को अनुकूलित कर सकते हैं।

6. दस्तावेज़ को सहेजें: अपना दस्तावेज़ डिज़ाइन करने के बाद, "फ़ाइल" मेनू पर जाएं और अपनी फ़ाइल को सहेजने के लिए "सहेजें" या "इस रूप में सहेजें" चुनें। अपने कंप्यूटर पर वांछित स्थान चुनें और दस्तावेज़ के लिए एक नाम प्रदान करें। Adobe Acrobat आपको अपनी फ़ाइल को PDF स्वरूप में सहेजने की अनुमति देता है, जो Acrobat के लिए डिफ़ॉल्ट फ़ाइल स्वरूप है।

7. समीक्षा करें और संपादित करें: सामग्री और स्वरूपण की समीक्षा करने के लिए Adobe Acrobat में सहेजे गए दस्तावेज़ को खोलें। यदि आपको कोई परिवर्तन करने की आवश्यकता है, तो दस्तावेज़ को आवश्यकतानुसार संशोधित करने के लिए एक्रोबैट में संपादन टूल का उपयोग करें।

8. दस्तावेज़ साझा करें: एक बार जब आप दस्तावेज़ से संतुष्ट हो जाते हैं, तो आप इसे दूसरों के साथ साझा कर सकते हैं। आप फ़ाइल को ईमेल के माध्यम से भेज सकते हैं, इसे वेबसाइट या क्लाउड स्टोरेज सेवा पर अपलोड कर सकते हैं, या इसे अन्य माध्यमों से साझा कर सकते हैं। प्राप्तकर्ता Adobe Acrobat Reader या अन्य PDF व्यूअर सॉफ़्टवेयर का उपयोग करके Adobe Acrobat फ़ाइल को खोल और देख सकते हैं।
किसी भी बदलाव को खोने से बचाने के लिए दस्तावेज़ बनाते और संपादित करते समय समय-समय पर अपना काम सहेजना याद रखें।


Adobe Acrobat is primarily a PDF editing and viewing tool, while some of the features you mentioned are specific to other Adobe software, such as Adobe InDesign or Adobe FrameMaker. However, I can provide you with some information related to Adobe Acrobat and PDF handling:-
Adobe Acrobat मुख्य रूप से एक PDF संपादन और देखने का उपकरण है, जबकि आपके द्वारा उल्लिखित कुछ विशेषताएँ अन्य Adobe सॉफ़्टवेयर के लिए विशिष्ट हैं, जैसे Adobe InDesign या Adobe FrameMaker। हालाँकि, मैं आपको Adobe Acrobat और PDF हैंडलिंग से संबंधित कुछ जानकारी प्रदान कर सकता हूँ:-

Font Issues:-
1. Embed fonts: To ensure that the fonts used in your PDF document are displayed correctly on other devices, you can embed the fonts within the PDF file. Go to "File" > "Properties" > "Fonts" tab, and select the option to embed fonts.

2. Replace fonts: If a particular font used in your PDF is not available on the viewer's device, you can replace it with a similar font that is more likely to be present. Use the "Edit PDF" tool to select the text and change the font.

फ़ॉन्ट मुद्दे:-
1. फ़ॉन्ट एम्बेड करें: यह सुनिश्चित करने के लिए कि आपके PDF दस्तावेज़ में उपयोग किए गए फ़ॉन्ट अन्य उपकरणों पर सही ढंग से प्रदर्शित हों, आप फ़ॉन्ट को PDF फ़ाइल में एम्बेड कर सकते हैं। "फ़ाइल"> "गुण"> "फ़ॉन्ट" टैब पर जाएं, और फ़ॉन्ट एम्बेड करने के विकल्प का चयन करें।

2. फोंट बदलें: यदि आपके पीडीएफ में इस्तेमाल किया गया कोई विशेष फॉन्ट दर्शक के डिवाइस पर उपलब्ध नहीं है, तो आप इसे एक समान फॉन्ट से बदल सकते हैं, जिसके मौजूद होने की संभावना अधिक है। पाठ का चयन करने और फ़ॉन्ट बदलने के लिए "पीडीएफ संपादित करें" टूल का उपयोग करें।

Managing Automatic Hypertext Links:-
When creating PDFs from certain file formats, such as Microsoft Word, hyperlinks can be automatically converted to clickable links in Adobe Acrobat. To manage these links:
1. Enable or disable automatic link creation: Go to "Edit" > "Preferences" > "General" (or "Edit" > "Preferences" > "Convert From PDF" in older versions) and check or uncheck the option for "Create Links from URLs."

2. Edit hyperlink properties: With the "Edit PDF" tool, select the hyperlink, right-click, and choose "Edit Link" to modify its destination, appearance, or other properties.

स्वचालित हाइपरटेक्स्ट लिंक प्रबंधित करना:-
Microsoft Word जैसे कुछ फ़ाइल स्वरूपों से PDF बनाते समय, हाइपरलिंक स्वचालित रूप से Adobe Acrobat में क्लिक करने योग्य लिंक में परिवर्तित हो सकते हैं। इन कड़ियों को प्रबंधित करने के लिए:
1. स्वचालित लिंक निर्माण को सक्षम या अक्षम करें: "संपादित करें" > "प्राथमिकताएं" > "सामान्य" (या "संपादित करें" > "प्राथमिकताएं" > "पीडीएफ से कनवर्ट करें" पुराने संस्करणों में) पर जाएं और "बनाएं" के विकल्प को चेक या अनचेक करें यूआरएल से लिंक।"

2. हाइपरलिंक गुण संपादित करें: "पीडीएफ संपादित करें" टूल के साथ, हाइपरलिंक का चयन करें, राइट-क्लिक करें, और इसके गंतव्य, स्वरूप, या अन्य गुणों को संशोधित करने के लिए "लिंक संपादित करें" चुनें।


Using the Tables Editor:-
Adobe Acrobat does not have a built-in Tables Editor. It is primarily used for working with PDFs rather than designing complex table layouts. For advanced table editing, you may need to use other Adobe applications like InDesign or Microsoft Word.

टेबल्स संपादक का उपयोग करना:-
Adobe Acrobat में बिल्ट-इन टेबल्स एडिटर नहीं है। यह मुख्य रूप से जटिल टेबल लेआउट डिजाइन करने के बजाय पीडीएफ़ के साथ काम करने के लिए उपयोग किया जाता है। उन्नत तालिका संपादन के लिए, आपको अन्य Adobe एप्लिकेशन जैसे InDesign या Microsoft Word का उपयोग करने की आवश्यकता हो सकती है।


Typing, Editing, and Formatting Text in Adobe Acrobat:-
In Adobe Acrobat, you can add, edit, and format text within PDF documents using the "Edit PDF" tool. Simply select the tool, click on the desired text area, and start typing. Use the formatting options available in the toolbar to change the font, size, color, alignment, and other text properties.

Adobe Acrobat में टेक्स्ट को टाइपिंग, एडिटिंग और फॉर्मेट करना:-
Adobe Acrobat में, आप "PDF संपादित करें" टूल का उपयोग करके PDF दस्तावेज़ों में टेक्स्ट जोड़, संपादित और स्वरूपित कर सकते हैं। बस उपकरण का चयन करें, वांछित टेक्स्ट क्षेत्र पर क्लिक करें, और टाइप करना प्रारंभ करें। फ़ॉन्ट, आकार, रंग, संरेखण और अन्य पाठ गुणों को बदलने के लिए टूलबार में उपलब्ध फ़ॉर्मेटिंग विकल्पों का उपयोग करें।

Exporting and Saving Adobe Tables:-
Adobe Acrobat is not specifically designed for creating or editing tables. However, you can export tables from other applications as PDFs or copy tables from PDFs into other applications. To save a PDF document, go to "File" > "Save" or "Save As" to specify a location and file name.

एडोब टेबल्स का निर्यात और सहेजना:-
Adobe Acrobat विशेष रूप से टेबल बनाने या संपादित करने के लिए डिज़ाइन नहीं किया गया है। हालाँकि, आप अन्य अनुप्रयोगों से तालिकाओं को PDF के रूप में निर्यात कर सकते हैं या PDF से अन्य अनुप्रयोगों में तालिकाएँ कॉपी कर सकते हैं। एक पीडीएफ दस्तावेज़ को बचाने के लिए, स्थान और फ़ाइल नाम निर्दिष्ट करने के लिए "फ़ाइल"> "सहेजें" या "इस रूप में सहेजें" पर जाएं।


Importing and Updating Tables:-
Adobe Acrobat is not intended for importing or updating tables. You would typically use other software, such as InDesign or Microsoft Word, to create or modify tables and then save or export them as PDFs.

आयात और अद्यतन तालिकाएँ:-
Adobe Acrobat का उद्देश्य तालिकाओं को आयात या अद्यतन करना नहीं है। आप आमतौर पर टेबल बनाने या संशोधित करने और फिर उन्हें पीडीएफ के रूप में सहेजने या निर्यात करने के लिए इनडिज़ीन या माइक्रोसॉफ्ट वर्ड जैसे अन्य सॉफ़्टवेयर का उपयोग करेंगे।

Sorting Pages, Balancing Columns, Creating Master Pages, Setting Up Pages:-
These are features typically found in desktop publishing software like Adobe InDesign rather than Adobe Acrobat. In Acrobat, you can reorder pages in a PDF document using the "Organize Pages" tool, but more advanced layout adjustments are not available.

पेज सॉर्ट करना, कॉलम बैलेंस करना, मास्टर पेज बनाना, पेज सेट करना:-
ये ऐसी विशेषताएं हैं जो आमतौर पर डेस्कटॉप पब्लिशिंग सॉफ्टवेयर जैसे Adobe Acrobat के बजाय Adobe InDesign में पाई जाती हैं। एक्रोबैट में, आप "पृष्ठ व्यवस्थित करें" टूल का उपयोग करके एक PDF दस्तावेज़ में पृष्ठों को पुनर्क्रमित कर सकते हैं, लेकिन अधिक उन्नत लेआउट समायोजन उपलब्ध नहीं हैं।


Using Story Editor:-
Adobe Acrobat does not have a specific "Story Editor" feature. Story Editor is a term commonly used in Adobe InDesign to refer to a window that provides a simplified view of the text content, allowing for more focused editing. In Acrobat, you can directly edit the text within PDF documents using the "Edit PDF" tool, without a dedicated Story Editor interface.

कहानी संपादक का उपयोग करना:-
Adobe Acrobat में कोई विशिष्ट "कहानी संपादक" सुविधा नहीं है। कहानी संपादक आमतौर पर Adobe InDesign में एक विंडो को संदर्भित करने के लिए उपयोग किया जाने वाला एक शब्द है जो पाठ्य सामग्री का एक सरलीकृत दृश्य प्रदान करता है, जिससे अधिक केंद्रित संपादन की अनुमति मिलती है। एक्रोबैट में, आप समर्पित स्टोरी एडिटर इंटरफ़ेस के बिना, "पीडीएफ संपादित करें" टूल का उपयोग करके सीधे पीडीएफ दस्तावेजों के भीतर पाठ को संपादित कर सकते हैं।


Adobe Pagemaker style sheets:-

Adobe PageMaker, although a popular desktop publishing software, is an older version that has been discontinued by Adobe. However, I can provide you with information on how to work with stylesheets, frames, and layers in PageMaker along with examples. Please note that it is recommended to use modern software like Adobe InDesign for these tasks.
Adobe PageMaker, हालांकि एक लोकप्रिय डेस्कटॉप पब्लिशिंग सॉफ्टवेयर है, लेकिन यह एक पुराना संस्करण है जिसे Adobe द्वारा बंद कर दिया गया है। हालांकि, मैं आपको उदाहरण के साथ पेजमेकर में स्टाइलशीट, फ्रेम और लेयर्स के साथ काम करने के तरीके के बारे में जानकारी प्रदान कर सकता हूं। कृपया ध्यान दें कि इन कार्यों के लिए Adobe InDesign जैसे आधुनिक सॉफ़्टवेयर का उपयोग करने की अनुशंसा की जाती है।


Working with Stylesheets in Adobe PageMaker:-

Stylesheets in PageMaker allow you to define and apply consistent formatting to text throughout your document. Here's how you can work with stylesheets in PageMaker:

Creating a Stylesheet: Go to the "Type" menu and select "Stylesheet." Click on "New" to create a new stylesheet. Give it a name and specify the desired formatting options such as font, size, alignment, etc.

Applying a Stylesheet: With your text cursor placed in the text you want to format, go to the "Type" menu, choose "Stylesheet," and select the desired stylesheet from the list. The selected formatting will be applied to the text.

एडोब पेजमेकर में स्टाइलशीट्स के साथ काम करना:-

पेजमेकर में स्टाइलशीट आपको अपने पूरे दस्तावेज़ में पाठ के अनुरूप स्वरूपण को परिभाषित करने और लागू करने की अनुमति देता है। यहां बताया गया है कि आप पेजमेकर में स्टाइलशीट के साथ कैसे काम कर सकते हैं:

स्टाइलशीट बनाना: "टाइप" मेनू पर जाएं और "स्टाइलशीट" चुनें। नई स्टाइलशीट बनाने के लिए "नया" पर क्लिक करें। इसे एक नाम दें और वांछित स्वरूपण विकल्प निर्दिष्ट करें जैसे कि फ़ॉन्ट, आकार, संरेखण, आदि।

स्टाइलशीट लागू करना: अपने टेक्स्ट कर्सर को उस टेक्स्ट में रखने के साथ जिसे आप फॉर्मेट करना चाहते हैं, "टाइप" मेनू पर जाएं, "स्टाइलशीट" चुनें और सूची से वांछित स्टाइलशीट चुनें। चयनित स्वरूपण पाठ पर लागू किया जाएगा।

Working with Frames in Adobe PageMaker:-

Frames in PageMaker allow you to contain and arrange your content within defined areas. Here's how you can work with frames:

Creating a Frame: Select the "Frame" tool from the toolbar. Click and drag on the document canvas to define the size and position of the frame.

Importing Content into a Frame: Select the "Place" command from the "File" menu or use the keyboard shortcut (Ctrl+D/Command+D). Browse for the file you want to import and click "Open." Click inside the frame to import the content.

Modifying a Frame: To resize or reposition a frame, select the "Selection" tool from the toolbar and click on the frame. Drag the frame handles to adjust its size or position.

एडोब पेजमेकर में फ्रेम्स के साथ काम करना:-

पेजमेकर में फ्रेम्स आपको परिभाषित क्षेत्रों के भीतर अपनी सामग्री को शामिल करने और व्यवस्थित करने की अनुमति देता है। यहां बताया गया है कि आप फ़्रेम के साथ कैसे काम कर सकते हैं:

फ़्रेम बनाना: टूलबार से "फ़्रेम" टूल चुनें। फ्रेम के आकार और स्थिति को परिभाषित करने के लिए दस्तावेज़ कैनवास पर क्लिक करें और खींचें।

फ़्रेम में सामग्री आयात करना: "फ़ाइल" मेनू से "प्लेस" कमांड चुनें या कीबोर्ड शॉर्टकट (Ctrl+D/Command+D) का उपयोग करें। उस फ़ाइल के लिए ब्राउज़ करें जिसे आप आयात करना चाहते हैं और "खोलें" पर क्लिक करें। सामग्री आयात करने के लिए फ्रेम के अंदर क्लिक करें।

एक फ्रेम को संशोधित करना: एक फ्रेम का आकार बदलने या बदलने के लिए, टूलबार से "चयन" टूल का चयन करें और फ्रेम पर क्लिक करें। फ्रेम के आकार या स्थिति को समायोजित करने के लिए फ्रेम के हैंडल को खींचें।

Working with Layers:-

Create a new layer: Go to the "Layers" menu and choose "New Layer" to create a new layer. You can give it a name and specify its visibility and color attributes.

Add objects to a layer: Select an object and choose the layer you want to add it to from the "Layers" menu. You can also drag and drop an object onto a layer.

Rearrange layers: To change the order of layers, drag and drop them in the "Layers" palette. The topmost layer will be displayed on top of the others.

परतों के साथ काम करना:-

एक नई परत बनाएं: "परतें" मेनू पर जाएं और एक नई परत बनाने के लिए "नई परत" चुनें। आप इसे एक नाम दे सकते हैं और इसकी दृश्यता और रंग विशेषताओं को निर्दिष्ट कर सकते हैं।

किसी परत में ऑब्जेक्ट जोड़ें: किसी ऑब्जेक्ट का चयन करें और "परतें" मेनू से उस परत को चुनें जिसमें आप इसे जोड़ना चाहते हैं। आप किसी वस्तु को किसी परत पर खींच कर छोड़ भी सकते हैं।

परतों को पुनर्व्यवस्थित करें: परतों के क्रम को बदलने के लिए, उन्हें "परतें" पैलेट में खींचें और छोड़ें। सबसे ऊपरी परत को अन्य के ऊपर प्रदर्शित किया जाएगा।

Example:-
Suppose you want to create a newsletter using PageMaker. You can use style sheets to define the formatting for the title, subtitle, body text, and other elements of the newsletter. You can create frames to hold images and articles and arrange them on the page. You can use layers to separate the background from the foreground elements, such as the text and images, and to control their visibility. For example, you can create a layer for the masthead, a layer for the articles, and a layer for the images. By doing so, you can easily turn layers on and off to preview different views of the newsletter. By using these PageMaker features, you can create a professional-looking newsletter with consistent formatting and layout.

उदाहरण:-
मान लीजिए आप पेजमेकर का उपयोग करके एक न्यूज़लेटर बनाना चाहते हैं। आप शीर्षक, उपशीर्षक, बॉडी टेक्स्ट और न्यूज़लेटर के अन्य तत्वों के लिए स्वरूपण को परिभाषित करने के लिए स्टाइल शीट का उपयोग कर सकते हैं। आप छवियों और लेखों को रखने के लिए फ़्रेम बना सकते हैं और उन्हें पृष्ठ पर व्यवस्थित कर सकते हैं। आप पृष्ठभूमि को अग्रभूमि तत्वों, जैसे पाठ और छवियों से अलग करने और उनकी दृश्यता को नियंत्रित करने के लिए परतों का उपयोग कर सकते हैं। उदाहरण के लिए, आप मास्टहेड के लिए एक परत, लेखों के लिए एक परत और छवियों के लिए एक परत बना सकते हैं। ऐसा करके, आप न्यूज़लेटर के विभिन्न दृश्यों का पूर्वावलोकन करने के लिए परतों को आसानी से चालू और बंद कर सकते हैं। पेजमेकर की इन सुविधाओं का उपयोग करके, आप सुसंगत स्वरूपण और लेआउट के साथ एक पेशेवर दिखने वाला न्यूज़लेटर बना सकते हैं।

Reference:- Adobe Acrobat Dc


DTP II Year, Unit 2, Vocational Course, NEP 2020, DAVV Indore , Higher education MP


The Control Palette in Adobe PageMaker is a feature that allows you to access commonly used tools and settings in a convenient and customizable interface. Control panels provide quick access to functions such as text formatting, object alignment, color selection, and more. Here are some basics to know about the control palette in PageMaker:-
Adobe PageMaker में नियंत्रण पैलेट एक सुविधा है जो आपको एक सुविधाजनक और अनुकूलन योग्य इंटरफ़ेस में आमतौर पर उपयोग किए जाने वाले टूल और सेटिंग्स तक पहुंचने की अनुमति देती है। नियंत्रण पटल पाठ स्वरूपण, वस्तु संरेखण, रंग चयन, और बहुत कुछ जैसे कार्यों के लिए त्वरित पहुँच प्रदान करते हैं। पेजमेकर में कंट्रोल पैलेट के बारे में जानने के लिए यहां कुछ मूलभूत बातें दी गई हैं: -

1. Accessing Control Palettes: Control palettes are located on the right side of the PageMaker interface. To open the Control palette, go to the Window menu and select the desired palette from the list.
1. एक्सेसिंग कंट्रोल पैलेट्स: कंट्रोल पैलेट्स पेजमेकर इंटरफेस के दायीं ओर स्थित होते हैं। कंट्रोल पैलेट खोलने के लिए, विंडो मेनू पर जाएं और सूची से वांछित पैलेट चुनें। 

2. Customizing the Control Palette: You can customize the content and layout of the Control Palette to suit your workflow and preferences. To add or remove tools from the Control palette, right-click on the palette and choose "Customize". From there, you can drag and drop tools to add or remove them.
2. नियंत्रण पैलेट को अनुकूलित करना: आप अपने वर्कफ़्लो और प्राथमिकताओं के अनुरूप नियंत्रण पैलेट की सामग्री और लेआउट को अनुकूलित कर सकते हैं। कंट्रोल पैलेट से टूल जोड़ने या हटाने के लिए, पैलेट पर राइट-क्लिक करें और "कस्टमाइज़ करें" चुनें। वहां से, आप टूल को जोड़ने या निकालने के लिए उन्हें ड्रैग और ड्रॉप कर सकते हैं। 

3. Using the Control Palette: To access a tool in the Control Palette, simply click on it. Some tools may require additional inputs or settings, which can be adjusted using the options in the palette.
3. कंट्रोल पैलेट का उपयोग करना: कंट्रोल पैलेट में टूल का उपयोग करने के लिए, बस उस पर क्लिक करें। कुछ उपकरणों को अतिरिक्त इनपुट या सेटिंग्स की आवश्यकता हो सकती है, जिन्हें पैलेट में विकल्पों का उपयोग करके समायोजित किया जा सकता है। 

4. Closing the Control Palette: To close the Control Palette, click the "X" in the upper-right corner of the palette. You can close all open Control Panels at once by going to the Window menu and selecting "Close All Palettes".
4. क्लोजिंग कंट्रोल पैलेट: कंट्रोल पैलेट को बंद करने के लिए, पैलेट के ऊपरी-दाएं कोने में "X" पर क्लिक करें। आप विंडो मेनू पर जाकर और "सभी पैलेट बंद करें" का चयन करके एक बार में सभी खुले नियंत्रण पटल बंद कर सकते हैं। 

Modifying Objects by Adjusting Values:-
With the Control Palette, you have precise control over the position, size, and other attributes of your objects. By selecting an object and adjusting the values in the Control Palette, you can effortlessly modify its properties. Whether you want to move an object to a specific location, resize it, or change its color, the Control Palette allows you to do so with ease.

मूल्यों को समायोजित करके वस्तुओं को संशोधित करना:-
कंट्रोल पैलेट के साथ, आपके पास अपनी वस्तुओं की स्थिति, आकार और अन्य विशेषताओं पर सटीक नियंत्रण होता है। किसी ऑब्जेक्ट का चयन करके और कंट्रोल पैलेट में मूल्यों को समायोजित करके, आप आसानी से इसके गुणों को संशोधित कर सकते हैं। चाहे आप किसी वस्तु को किसी विशिष्ट स्थान पर ले जाना चाहते हैं, उसका आकार बदलना चाहते हैं, या उसका रंग बदलना चाहते हैं, कंट्रोल पैलेट आपको आसानी से ऐसा करने की अनुमति देता है।


Using the Reference-Point Proxy:- 
The reference point plays a crucial role in object manipulation. It determines the point around which transformations such as scaling and rotation occur. The Control Palette provides a reference-point proxy that allows you to interactively adjust the reference point. By dragging the reference-point proxy, you can effortlessly change the pivot point of the object and control how transformations are applied.

संदर्भ-बिंदु प्रॉक्सी का उपयोग करना:-
ऑब्जेक्ट हेरफेर में संदर्भ बिंदु महत्वपूर्ण भूमिका निभाता है। यह उस बिंदु को निर्धारित करता है जिसके आसपास स्केलिंग और रोटेशन जैसे परिवर्तन होते हैं। नियंत्रण पैलेट एक संदर्भ-बिंदु प्रॉक्सी प्रदान करता है जो आपको संदर्भ बिंदु को अंतःक्रियात्मक रूप से समायोजित करने की अनुमति देता है। संदर्भ-बिंदु प्रॉक्सी को खींचकर, आप अनायास ही वस्तु के धुरी बिंदु को बदल सकते हैं और नियंत्रित कर सकते हैं कि परिवर्तन कैसे लागू होते हैं।

Setting Measurement and Nudge Preferences:-
Page Maker provides flexible options for setting measurement units to suit your design requirements. The Control Palette allows you to configure the measurement units based on your preference. Additionally, you can utilize nudge preferences to make precise adjustments to the position of objects. By specifying the nudge distance in the Control Palette, you can incrementally move objects to achieve pixel-perfect alignment.

मापन और नज वरीयताएँ निर्धारित करना:-
पेज मेकर आपकी डिजाइन आवश्यकताओं के अनुरूप माप इकाइयों को सेट करने के लिए लचीले विकल्प प्रदान करता है। कंट्रोल पैलेट आपको अपनी पसंद के आधार पर माप इकाइयों को कॉन्फ़िगर करने की अनुमति देता है। इसके अतिरिक्त, आप वस्तुओं की स्थिति में सटीक समायोजन करने के लिए नज प्राथमिकताओं का उपयोग कर सकते हैं। कंट्रोल पैलेट में नज दूरी निर्दिष्ट करके, आप पिक्सेल-पूर्ण संरेखण प्राप्त करने के लिए वस्तुओं को बढ़ा सकते हैं।

Moving Objects:-
Moving objects is a fundamental aspect of graphic design, and the Control Palette simplifies this task. By selecting an object and adjusting the position values in the Control Palette, you can effortlessly move it across the page. The Control Palette provides precise control, enabling you to align objects accurately and create visually pleasing layouts.

चलती हुई वस्तुएँ:-
मूविंग ऑब्जेक्ट्स ग्राफिक डिज़ाइन का एक मूलभूत पहलू है, और कंट्रोल पैलेट इस कार्य को सरल करता है। किसी वस्तु का चयन करके और नियंत्रण पटल में स्थिति मानों को समायोजित करके, आप आसानी से इसे पूरे पृष्ठ पर ले जा सकते हैं। कंट्रोल पैलेट सटीक नियंत्रण प्रदान करता है, जिससे आप वस्तुओं को सटीक रूप से संरेखित कर सकते हैं और नेत्रहीन आकर्षक लेआउट बना सकते हैं।

Rotating an Object:-
The Control Palette offers a convenient way to rotate objects in Page Maker. With a selected object, you can adjust the rotation angle using the Control Palette. By specifying the desired angle or interactively dragging the rotation control, you can easily achieve the desired orientation for your object. This feature is particularly useful when working with images, logos, or other design elements that require rotation.

किसी वस्तु का घूमना:-
कंट्रोल पैलेट पेज मेकर में ऑब्जेक्ट को रोटेट करने का सुविधाजनक तरीका प्रदान करता है। किसी चयनित ऑब्जेक्ट के साथ, आप कंट्रोल पैलेट का उपयोग करके रोटेशन कोण को समायोजित कर सकते हैं। वांछित कोण निर्दिष्ट करके या रोटेशन नियंत्रण को अंतःक्रियात्मक रूप से खींचकर, आप अपनी वस्तु के लिए वांछित अभिविन्यास आसानी से प्राप्त कर सकते हैं। छवियों, लोगो, या अन्य डिज़ाइन तत्वों के साथ काम करते समय यह सुविधा विशेष रूप से उपयोगी होती है, जिन्हें घुमाने की आवश्यकता होती है।


Reflecting an Object:-
Sometimes you may need to flip or mirror an object horizontally or vertically. The Control Palette allows you to reflect objects effortlessly. By selecting the object and using the reflection options in the Control Palette, you can instantly achieve the desired effect. This feature is especially handy when creating symmetrical designs or working with text that needs to be mirrored.

किसी वस्तु को परावर्तित करना:-
कभी-कभी आपको किसी वस्तु को क्षैतिज या लंबवत रूप से फ़्लिप या मिरर करने की आवश्यकता हो सकती है। कंट्रोल पैलेट आपको वस्तुओं को सहजता से प्रतिबिंबित करने की अनुमति देता है। ऑब्जेक्ट का चयन करके और कंट्रोल पैलेट में प्रतिबिंब विकल्पों का उपयोग करके, आप तुरंत वांछित प्रभाव प्राप्त कर सकते हैं। सममित डिजाइन बनाते समय या मिरर किए जाने वाले टेक्स्ट के साथ काम करते समय यह सुविधा विशेष रूप से आसान होती है।

Skewing an Object:-
Skew transformations can add a dynamic and distorted look to your designs. With the Control Palette, you can easily apply skew to objects in Page Maker. By adjusting the skew values, you can create interesting effects and give your designs a unique touch. The Control Palette provides a user-friendly interface for controlling the amount of skew applied to objects.

किसी वस्तु को तिरछा करना :-
तिरछा परिवर्तन आपके डिजाइनों में एक गतिशील और विकृत रूप जोड़ सकता है। कंट्रोल पैलेट के साथ, आप पेज मेकर में ऑब्जेक्ट पर आसानी से तिरछा लगा सकते हैं। तिरछा मूल्यों को समायोजित करके, आप दिलचस्प प्रभाव पैदा कर सकते हैं और अपने डिजाइनों को एक अनूठा स्पर्श दे सकते हैं। नियंत्रण पैलेट वस्तुओं पर लागू तिरछापन की मात्रा को नियंत्रित करने के लिए एक उपयोगकर्ता के अनुकूल इंटरफेस प्रदान करता है।

Removing Transformation:-
If you want to revert an object to its original state or remove any previously applied transformations, the Control Palette allows you to do so effortlessly. By selecting the object and using the reset or remove transformation options in the Control Palette, you can quickly eliminate any applied scaling, rotation, skew, or reflection. This feature is valuable when you need to fine-tune your design or start over with the original object properties.

परिवर्तन हटाना:-
यदि आप किसी वस्तु को उसकी मूल स्थिति में वापस लाना चाहते हैं या पहले लागू किए गए परिवर्तनों को हटाना चाहते हैं, तो कंट्रोल पैलेट आपको आसानी से ऐसा करने की अनुमति देता है। ऑब्जेक्ट का चयन करके और कंट्रोल पैलेट में रीसेट या रिमूव ट्रांसफ़ॉर्मेशन विकल्पों का उपयोग करके, आप किसी भी लागू स्केलिंग, रोटेशन, स्क्यू या रिफ्लेक्शन को जल्दी से समाप्त कर सकते हैं। यह सुविधा तब मूल्यवान होती है जब आपको अपने डिज़ाइन को ठीक करने या मूल ऑब्जेक्ट गुणों के साथ प्रारंभ करने की आवश्यकता होती है।

Aligning and Distributing Objects:-
Precise alignment and distribution of objects are essential for achieving a professional-looking layout. The Control Palette provides a range of options to align and distribute objects accurately. Whether you want to align objects to a specific point, distribute them evenly, or create proportional spacing, the Control Palette offers intuitive controls for achieving these alignments. This feature simplifies the process of arranging objects in a visually pleasing manner.

वस्तुओं का संरेखण और वितरण:-
पेशेवर दिखने वाले लेआउट को प्राप्त करने के लिए सटीक संरेखण और वस्तुओं का वितरण आवश्यक है। कंट्रोल पैलेट वस्तुओं को सटीक रूप से संरेखित करने और वितरित करने के लिए विकल्पों की एक श्रृंखला प्रदान करता है। चाहे आप वस्तुओं को एक विशिष्ट बिंदु पर संरेखित करना चाहते हैं, उन्हें समान रूप से वितरित करना चाहते हैं, या आनुपातिक रिक्ति बनाना चाहते हैं, नियंत्रण पटल इन संरेखणों को प्राप्त करने के लिए सहज नियंत्रण प्रदान करता है। यह विशेषता वस्तुओं को दृष्टिगत रूप से मनभावन तरीके से व्यवस्थित करने की प्रक्रिया को सरल बनाती है।

Grouping and Ungrouping:-
Grouping objects allows you to treat multiple objects as a single entity. The Control Palette provides easy-to-use functions for grouping and ungrouping objects in Page Maker. By selecting the objects and using the grouping options in the Control Palette, you can organize your design elements efficiently. Grouping simplifies the manipulation of multiple objects and ensures that they maintain their relative positions.

ग्रुपिंग और अनग्रुपिंग: -
ग्रुपिंग ऑब्जेक्ट्स आपको एक ही इकाई के रूप में कई ऑब्जेक्ट्स का इलाज करने की अनुमति देता है। पेज मेकर में ग्रुपिंग और अनग्रुपिंग ऑब्जेक्ट्स के लिए कंट्रोल पैलेट उपयोग में आसान फ़ंक्शन प्रदान करता है। ऑब्जेक्ट्स का चयन करके और कंट्रोल पैलेट में ग्रुपिंग विकल्पों का उपयोग करके, आप अपने डिज़ाइन तत्वों को कुशलतापूर्वक व्यवस्थित कर सकते हैं। समूहीकरण कई वस्तुओं के हेरफेर को सरल करता है और यह सुनिश्चित करता है कि वे अपनी सापेक्ष स्थिति बनाए रखें।

Rules for Grouping Objects:-
While grouping objects can enhance your design workflow, it's essential to follow some rules for effective grouping. 
Firstly, ensure that the objects you want to group are selected. 
Secondly, consider the stacking order of objects as it affects how they are displayed when grouped. Lastly, be aware that grouped objects share properties and transformations, so any modifications made to one object in the group will affect the others.
ग्रुपिंग ऑब्जेक्ट्स के नियम: -
जबकि समूहीकरण ऑब्जेक्ट आपके डिज़ाइन वर्कफ़्लो को बढ़ा सकते हैं, प्रभावी समूहीकरण के लिए कुछ नियमों का पालन करना आवश्यक है।
सबसे पहले, सुनिश्चित करें कि जिन वस्तुओं को आप समूहित करना चाहते हैं, वे चयनित हैं।
दूसरे, वस्तुओं के स्टैकिंग क्रम पर विचार करें क्योंकि यह प्रभावित करता है कि समूहीकृत होने पर उन्हें कैसे प्रदर्शित किया जाता है। अंत में, जागरूक रहें कि समूहीकृत वस्तुएं गुणों और परिवर्तनों को साझा करती हैं, इसलिए समूह में एक वस्तु में किए गए कोई भी संशोधन दूसरों को प्रभावित करेंगे।

Changing the Stacking Order of Objects:-
In Page Maker, the stacking order determines the visibility and overlapping of objects. The Control Palette provides options for changing the stacking order of objects easily. By selecting an object and using the bring forward, send backward, or arrange options in the Control Palette, you can control how objects appear in relation to each other. This feature is particularly useful when working with layered designs or complex compositions.

वस्तुओं के स्टैकिंग क्रम को बदलना:-
पेज मेकर में, स्टैकिंग क्रम वस्तुओं की दृश्यता और ओवरलैपिंग को निर्धारित करता है। कंट्रोल पैलेट वस्तुओं के स्टैकिंग क्रम को आसानी से बदलने के लिए विकल्प प्रदान करता है। किसी ऑब्जेक्ट का चयन करके और आगे लाएं, पीछे भेजें, या कंट्रोल पैलेट में विकल्पों को व्यवस्थित करें, आप नियंत्रित कर सकते हैं कि ऑब्जेक्ट एक दूसरे के संबंध में कैसे दिखाई देते हैं। स्तरित डिज़ाइन या जटिल रचनाओं के साथ काम करते समय यह सुविधा विशेष रूप से उपयोगी होती है।


Locking Objects:-
To prevent accidental modifications to specific objects in your design, you can lock them using the Control Palette. By selecting the objects and using the lock options, you can ensure that they remain fixed and unalterable. Locking objects provides peace of mind when working on intricate designs or collaborating with others. The Control Palette simplifies the process of locking and unlocking objects as needed.

लॉकिंग ऑब्जेक्ट्स: -
अपने डिज़ाइन में विशिष्ट वस्तुओं में आकस्मिक संशोधनों को रोकने के लिए, आप उन्हें कंट्रोल पैलेट का उपयोग करके लॉक कर सकते हैं। वस्तुओं का चयन करके और लॉक विकल्पों का उपयोग करके, आप यह सुनिश्चित कर सकते हैं कि वे स्थिर और अपरिवर्तनीय रहें। जटिल डिजाइनों पर काम करते समय या दूसरों के साथ सहयोग करते समय वस्तुओं को लॉक करना मन की शांति प्रदान करता है। नियंत्रण पटल आवश्यकतानुसार वस्तुओं को लॉक और अनलॉक करने की प्रक्रिया को सरल करता है।

Adobe Page Maker Long documents features:-

Are you looking to create professional-looking long documents with ease? Adobe Page Maker, a powerful desktop publishing software, offers a range of features specifically designed for handling long documents efficiently. In this article, we will explore the various long document features in Adobe Page Maker, including compiling chapters into a book, preparing the book, combining chapters, numbering pages, restarting page numbering, and creating a table of contents.
क्या आप आसानी से पेशेवर दिखने वाले लंबे दस्तावेज़ बनाना चाहते हैं? एडोब पेज मेकर, एक शक्तिशाली डेस्कटॉप पब्लिशिंग सॉफ्टवेयर, विशेष रूप से लंबे दस्तावेज़ों को कुशलतापूर्वक संभालने के लिए डिज़ाइन की गई कई सुविधाएँ प्रदान करता है। इस लेख में, हम Adobe पेज मेकर में विभिन्न लंबे दस्तावेज़ सुविधाओं का पता लगाएंगे, जिसमें अध्यायों को एक पुस्तक में संकलित करना, पुस्तक तैयार करना, अध्यायों का संयोजन करना, पृष्ठों को क्रमांकित करना, पृष्ठ क्रमांकन को फिर से शुरू करना और सामग्री की तालिका बनाना शामिल है।

Understanding Page Maker's Long Documents Features:-
Before we delve into the specifics, let's understand the concept of long documents in Adobe Page Maker. Long documents typically include reports, books, manuals, and other publications that span multiple pages and consist of multiple chapters or sections. Adobe Page Maker provides comprehensive tools and functionalities to streamline the process of creating and managing such documents.

पेज मेकर की लंबी दस्तावेज़ सुविधाओं को समझना:-
इससे पहले कि हम विशिष्टताओं में तल्लीन हों, आइए Adobe पेज मेकर में लंबे दस्तावेज़ों की अवधारणा को समझें। लंबे दस्तावेजों में आम तौर पर रिपोर्ट, किताबें, मैनुअल और अन्य प्रकाशन शामिल होते हैं जो कई पृष्ठों तक फैले होते हैं और इसमें कई अध्याय या खंड होते हैं। Adobe पेज मेकर ऐसे दस्तावेज़ बनाने और प्रबंधित करने की प्रक्रिया को कारगर बनाने के लिए व्यापक टूल और कार्यात्मकताएं प्रदान करता है।

1. Compiling Chapters into a Book:-
When working on a book or a large document with multiple chapters, Adobe Page Maker allows you to compile these individual chapters into a cohesive book. This feature simplifies the process of organizing and managing a complex document structure.
To compile chapters into a book, you can import each chapter into Adobe Page Maker and arrange them in the desired order. By doing so, you maintain consistency in formatting, styles, and page numbering throughout the entire document.

1. अध्यायों को एक पुस्तक में संकलित करना:-
किसी किताब या कई अध्यायों वाले बड़े दस्तावेज़ पर काम करते समय, Adobe पेज मेकर आपको इन अलग-अलग अध्यायों को एक जोड़ने वाली किताब में संकलित करने की अनुमति देता है। यह सुविधा जटिल दस्तावेज़ संरचना को व्यवस्थित और प्रबंधित करने की प्रक्रिया को सरल बनाती है।
अध्यायों को एक पुस्तक में संकलित करने के लिए, आप प्रत्येक अध्याय को Adobe पेज मेकर में आयात कर सकते हैं और उन्हें वांछित क्रम में व्यवस्थित कर सकते हैं। ऐसा करने से, आप संपूर्ण दस्तावेज़ में स्वरूपण, शैली और पृष्ठ क्रमांकन में निरंतरता बनाए रखते हैं।

2. Preparing the Book:-
Preparing the book involves setting up various elements to ensure a consistent layout and formatting across all pages. In Adobe Page Maker, you can define master pages that contain recurring design elements such as headers, footers, and page numbers. By applying master pages to your document, you can save time and effort by automatically applying these design elements to multiple pages.
Additionally, you can utilize styles and templates in Adobe Page Maker to maintain a consistent look and feel throughout the document. Styles allow you to define formatting attributes for different elements such as headings, paragraphs, and captions, making it easier to apply and update formatting consistently.

2. किताब तैयार करना:-
पुस्तक तैयार करने में सभी पृष्ठों पर एक सुसंगत लेआउट और स्वरूपण सुनिश्चित करने के लिए विभिन्न तत्वों को स्थापित करना शामिल है। एडोब पेज मेकर में, आप उन मास्टर पेजों को परिभाषित कर सकते हैं जिनमें हेडर, फुटर और पेज नंबर जैसे पुनरावर्ती डिज़ाइन तत्व शामिल हैं। अपने दस्तावेज़ में मास्टर पृष्ठ लागू करके, आप इन डिज़ाइन तत्वों को एकाधिक पृष्ठों पर स्वचालित रूप से लागू करके समय और प्रयास बचा सकते हैं।
इसके अतिरिक्त, आप पूरे दस्तावेज़ में एक सुसंगत रूप और अनुभव बनाए रखने के लिए Adobe पेज मेकर में शैलियों और टेम्पलेट्स का उपयोग कर सकते हैं। शैलियाँ आपको विभिन्न तत्वों जैसे शीर्षक, पैराग्राफ और कैप्शन के लिए स्वरूपण विशेषताओं को परिभाषित करने की अनुमति देती हैं, जिससे स्वरूपण को लगातार लागू करना और अद्यतन करना आसान हो जाता है।


3. Combining the Chapters:-
Once you have imported and organized the chapters, Adobe Page Maker enables you to seamlessly combine them into a single document. By inserting page breaks at the end of each chapter, you can ensure that each chapter starts on a new page. This feature helps maintain the structure and readability of the document. Furthermore, you can link text frames between pages to allow text to flow from one frame to another. This is particularly useful when working with lengthy chapters that span multiple pages.

3. अध्यायों का संयोजन:-
एक बार जब आप अध्यायों को आयात और व्यवस्थित कर लेते हैं, तो Adobe पेज मेकर आपको उन्हें एक दस्तावेज़ में मूल रूप से संयोजित करने में सक्षम बनाता है। प्रत्येक अध्याय के अंत में पृष्ठ विराम सम्मिलित करके, आप यह सुनिश्चित कर सकते हैं कि प्रत्येक अध्याय एक नए पृष्ठ पर प्रारंभ हो। यह सुविधा दस्तावेज़ की संरचना और पठनीयता को बनाए रखने में मदद करती है। इसके अलावा, आप टेक्स्ट को एक फ्रेम से दूसरे फ्रेम में प्रवाहित करने की अनुमति देने के लिए टेक्स्ट फ्रेम को पृष्ठों के बीच लिंक कर सकते हैं। यह विशेष रूप से तब उपयोगी होता है जब कई पृष्ठों वाले लंबे अध्यायों के साथ काम किया जाता है।

4. Numbering Pages:-
Numbering pages is crucial for navigating and referencing content within a long document. Adobe Page Maker offers flexible options for numbering pages according to your document's requirements.
You can set up page numbering in Adobe Page Maker by defining the starting page number and selecting the desired numbering style. Whether you prefer Arabic numerals, Roman numerals, or a combination of both, Page Maker provides the flexibility to customize page numbering to suit your needs.

4. नंबरिंग पेज: -
एक लंबे दस्तावेज़ के भीतर सामग्री को नेविगेट करने और संदर्भित करने के लिए नंबरिंग पृष्ठ महत्वपूर्ण हैं। Adobe पेज मेकर आपके दस्तावेज़ की आवश्यकताओं के अनुसार पृष्ठों को क्रमांकित करने के लिए लचीले विकल्प प्रदान करता है।
आप शुरुआती पेज नंबर को परिभाषित करके और वांछित नंबरिंग शैली का चयन करके एडोब पेज मेकर में पेज नंबरिंग सेट कर सकते हैं। चाहे आप अरबी अंक, रोमन अंक, या दोनों का संयोजन पसंद करते हों, पेज मेकर आपकी आवश्यकताओं के अनुरूप पेज नंबरिंग को अनुकूलित करने की सुविधा प्रदान करता है।

5. Restarting Page Numbering:-
In certain cases, you may need to restart page numbering within your document. Adobe Page Maker allows you to insert section breaks where you want to reset the page numbers. This feature is especially useful when dividing your document into sections such as chapters or appendices, each requiring separate numbering.
By inserting section breaks and specifying the starting page number for each section, you can ensure clear and consistent page numbering throughout the document.

5. पेज नंबरिंग को फिर से शुरू करना:-
कुछ मामलों में, आपको अपने दस्तावेज़ में पृष्ठ क्रमांकन फिर से शुरू करने की आवश्यकता हो सकती है। एडोब पेज मेकर आपको अनुभाग विराम सम्मिलित करने की अनुमति देता है जहां आप पेज नंबर रीसेट करना चाहते हैं। यह सुविधा विशेष रूप से तब उपयोगी होती है जब आपके दस्तावेज़ को अध्याय या परिशिष्ट जैसे अनुभागों में विभाजित किया जाता है, प्रत्येक को अलग-अलग नंबरिंग की आवश्यकता होती है।
खंड विराम सम्मिलित करके और प्रत्येक अनुभाग के लिए प्रारंभिक पृष्ठ संख्या निर्दिष्ट करके, आप पूरे दस्तावेज़ में स्पष्ट और सुसंगत पृष्ठ क्रमांकन सुनिश्चित कर सकते हैं।

6. Creating a Table of Contents:-
A well-structured table of contents (TOC) enhances the usability of a long document by providing an overview of its contents and facilitating easy navigation. Adobe Page Maker simplifies the process of creating a table of contents for your document.To create a table of contents, you can define paragraph styles for TOC entries, such as headings and subheadings. Adobe Page Maker then generates the table of contents automatically, based on the specified styles and their corresponding page numbers. This feature saves you valuable time and effort in manually creating and updating a table of contents.

6. अनुक्रमाणिका (सामग्री तालिका) बनाना:-
सामग्री की एक अच्छी तरह से संरचित तालिका (TOC) इसकी सामग्री का अवलोकन प्रदान करके और आसान नेविगेशन की सुविधा प्रदान करके एक लंबे दस्तावेज़ की उपयोगिता को बढ़ाती है। Adobe पेज मेकर आपके दस्तावेज़ के लिए सामग्री की तालिका बनाने की प्रक्रिया को सरल करता है। सामग्री की तालिका बनाने के लिए, आप TOC प्रविष्टियों के लिए पैराग्राफ़ शैलियों को परिभाषित कर सकते हैं, जैसे शीर्षक और उपशीर्षक। Adobe पेज मेकर तब निर्दिष्ट शैलियों और उनके संबंधित पेज नंबरों के आधार पर सामग्री की तालिका स्वचालित रूप से उत्पन्न करता है। यह सुविधा सामग्री तालिका को मैन्युअल रूप से बनाने और अपडेट करने में आपका बहुमूल्य समय और प्रयास बचाती है।


DTP II Year, Unit 1, Vocational Course, NEP 2020, DAVV Indore, Higher education MP

DTP Vocational Course 
II Year NEP 2020
Syllabus 
Unit-1
Working with a publication, Opening a Publication, Creating a New Document, Setting the Margins, Setting the Page Size, Setting the Page Orientation, Introduction, Placing Graphics, Placing in-Line Graphics, Converting an Independent Graphic to an In-Line Graphic, Aligning In-Line Graphics, Sizing Graphics, Cropping Graphics, Object Linking and Embedding (OLE), Setting Up an OLE Liked Object, Embedding an OLE Object, Text Wrap.

Unit-2
Introduction, Using the Control Palette, Control Palette Basics, Modifying Objects by Adjusting Values, Using the Reference-Point Proxy, Setting Measurement and Nudge Preferences, Moving Objects, Rotating an Object, Reflecting an Object, Skewing an Object, Removing Transformation, Aligning and Distributing Objects, Grouping and Ungrouping, Rules for Grouping Objects, Changing the Staking Order of Objects, Locking Objects. Working with large amount of texts. Long documents features: Compiling Chapters into a Book, Preparing the Book, Combing the Chapters, Numbering Pages, Restarting Page Numbering, Creating a Table of Contents.
Unit-3
Creating PDF Files with Acrobat, Creating an Adobe Acrobat File, Font Issues, Managing Automatic Hypertext Links, Using the Tables Editor, Setting Adobe Table Defaults, Adobe Table Preferences. Typing, Editing and Formatting Text in Adobe Table, Formatting Text in a Table, Exporting and Saving Adobe Tables, Exporting Tables from Adobe Table, Exporting a Table as Text, Exporting a Table as a Graphic. Saving Adobe Tables, Importing and Updating Table, Sorting Pages, Balancing Columns, Create Keyline, Bullets and Numbering, Add Continued Line Creating Master Pages, Setting Up Pages, Use Of story editor. Pagemaker style sheets, working with frame, working with layers


What is PageMaker?
PageMaker is a desktop publishing program developed by Adobe Systems. It revolutionized the publishing industry by providing an intuitive platform for creating visually appealing layouts without the need for specialized training. With PageMaker, users can combine text, images, and graphics to produce stunning publications.
PageMaker is a powerful publishing software that allows users to create professional-quality publications for print and digital media. Whether you're designing brochures, newsletters, or even books, PageMaker offers a range of features and tools to make the publication process efficient and effective. In this article, we will explore the various aspects of working with publication in PageMaker and provide you with valuable tips to enhance your workflow.

पेजमेकर क्या है?
पेजमेकर एडोब सिस्टम्स द्वारा विकसित एक डेस्कटॉप पब्लिशिंग प्रोग्राम है। इसने विशेष प्रशिक्षण की आवश्यकता के बिना नेत्रहीन आकर्षक लेआउट बनाने के लिए एक सहज मंच प्रदान करके प्रकाशन उद्योग में क्रांति ला दी। पेजमेकर के साथ, उपयोगकर्ता आश्चर्यजनक प्रकाशन बनाने के लिए टेक्स्ट, छवियों और ग्राफिक्स को जोड़ सकते हैं।

पेजमेकर एक शक्तिशाली प्रकाशन सॉफ्टवेयर है जो उपयोगकर्ताओं को प्रिंट और डिजिटल मीडिया के लिए पेशेवर-गुणवत्ता वाले प्रकाशन बनाने की अनुमति देता है। चाहे आप ब्रोशर, न्यूज़लेटर्स, या यहां तक ​​कि किताबें डिज़ाइन कर रहे हों, पेजमेकर प्रकाशन प्रक्रिया को कुशल और प्रभावी बनाने के लिए कई प्रकार की सुविधाएँ और उपकरण प्रदान करता है। इस लेख में, हम पेजमेकर में प्रकाशन के साथ काम करने के विभिन्न पहलुओं का पता लगाएंगे और आपके कार्यप्रवाह को बढ़ाने के लिए आपको बहुमूल्य सुझाव प्रदान करेंगे।

Features of PageMaker
PageMaker comes with a rich set of features that cater to the needs of professional publishers. Some of its key features include:-

1. WYSIWYG Interface: PageMaker offers a "What You See Is What You Get" interface, allowing users to view the document as it will appear in the final output.

2. Layout Tools: The software provides a wide range of layout tools to arrange text, images, and graphics precisely.

3. Typography Options: PageMaker offers extensive typographic control, including font selection, leading, kerning, and more.

4. Image Editing: Users can import images and perform basic editing tasks such as cropping, resizing, and adjusting brightness/contrast.

5. Color Management: PageMaker allows for precise color control, ensuring accurate reproduction in both print and digital formats.

पेजमेकर की विशेषताएं:-
पेजमेकर सुविधाओं के समृद्ध सेट के साथ आता है जो पेशेवर प्रकाशकों की जरूरतों को पूरा करता है। इसकी कुछ प्रमुख विशेषताओं में शामिल हैं:-

1. WYSIWYG इंटरफ़ेस: पेजमेकर एक "जो आप देखते हैं वही आपको मिलता है" इंटरफ़ेस प्रदान करता है, जो उपयोगकर्ताओं को दस्तावेज़ को देखने की अनुमति देता है क्योंकि यह अंतिम आउटपुट में दिखाई देगा।

2. लेआउट टूल्स: सॉफ्टवेयर टेक्स्ट, इमेज और ग्राफिक्स को ठीक से व्यवस्थित करने के लिए लेआउट टूल्स की एक विस्तृत श्रृंखला प्रदान करता है।

3. टाइपोग्राफी विकल्प: पेजमेकर व्यापक टाइपोग्राफिक नियंत्रण प्रदान करता है, जिसमें फॉन्ट चयन, अग्रणी, कर्निंग और बहुत कुछ शामिल है।

4. छवि संपादन: उपयोगकर्ता छवियों को आयात कर सकते हैं और बुनियादी संपादन कार्य कर सकते हैं जैसे कि क्रॉप करना, आकार बदलना और चमक/कंट्रास्ट को समायोजित करना।

5. रंग प्रबंधन: पेजमेकर सटीक रंग नियंत्रण की अनुमति देता है, प्रिंट और डिजिटल दोनों स्वरूपों में सटीक प्रजनन सुनिश्चित करता है।


Benefits of using PageMaker
Using PageMaker for publication offers several benefits:-

1. Ease of Use: PageMaker's intuitive interface makes it accessible to both beginners and experienced users.

2. Versatility: The software supports a wide range of publication types, from simple flyers to complex books.

3. Integration with Adobe Suite: PageMaker seamlessly integrates with other Adobe software like Photoshop and Illustrator, allowing for efficient workflows.

4. Customization: Users can create and save custom templates, styles, and layouts, streamlining the publication process.

पेजमेकर का उपयोग करने के लाभ:-
प्रकाशन के लिए पेजमेकर का उपयोग करने से कई लाभ मिलते हैं:-

1. उपयोग में आसानी: पेजमेकर का सहज इंटरफ़ेस इसे शुरुआती और अनुभवी उपयोगकर्ताओं दोनों के लिए सुलभ बनाता है।

2. बहुमुखी प्रतिभा: सॉफ्टवेयर प्रकाशन प्रकारों की एक विस्तृत श्रृंखला का समर्थन करता है, साधारण यात्रियों से लेकर जटिल पुस्तकों तक।

3. एडोब सूट के साथ एकीकरण: पेजमेकर फोटोशॉप और इलस्ट्रेटर जैसे अन्य एडोब सॉफ्टवेयर के साथ समेकित रूप से एकीकृत करता है, जिससे कुशल कार्यप्रवाह की अनुमति मिलती है।

4. अनुकूलन: उपयोगकर्ता प्रकाशन प्रक्रिया को सुव्यवस्थित करते हुए कस्टम टेम्प्लेट, स्टाइल और लेआउट बना और सहेज सकते हैं।


Understanding the Publication Process:-
To work effectively with publication in PageMaker, it's essential to understand the keysteps involved. Let's walk through the process:-

1. Setting up a Document: Start by creating a new document with the appropriate dimensions and settings for your publication.

2. Importing and Formatting Text: Import your text content into PageMaker and format it using various typographic options.

3. Inserting Images and Graphics: Enhance your publication by inserting relevant images and graphics, positioning them accurately.

4. Arranging and Formatting Content: Use PageMaker's layout tools to arrange and format your content in an aesthetically pleasing manner.

5. Working with Templates: Utilize pre-designed templates or create your own to save time and maintain consistency throughout your publication.

6. Applying Styles and Formatting: Apply consistent styles and formatting options to ensure a cohesive look and feel.

7. Managing Pages and Layouts: Organize your publication by managing pages, including adding, deleting, and rearranging them.

8. Reviewing and Proofreading: Thoroughly review your publication, checking for errors, typos, and formatting inconsistencies.

9. Exporting and Printing: Finally, export your publication to the desired format, whether for print or digital distribution, and ensure proper printing settings are applied.

प्रकाशन प्रक्रिया को समझना:-
पेजमेकर में प्रकाशन के साथ प्रभावी ढंग से काम करने के लिए इसमें शामिल कीस्टेप्स को समझना आवश्यक है। आइए जानते हैं प्रोसेस:-

1. दस्तावेज़ सेट करना: अपने प्रकाशन के लिए उपयुक्त आयामों और सेटिंग्स के साथ एक नया दस्तावेज़ बनाकर प्रारंभ करें।

2. टेक्स्ट इम्पोर्ट और फॉर्मेट करना: अपने टेक्स्ट कंटेंट को पेजमेकर में इम्पोर्ट करें और विभिन्न टाइपोग्राफिक विकल्पों का उपयोग करके इसे फॉर्मेट करें।

3. छवियां और ग्राफ़िक्स सम्मिलित करना: प्रासंगिक छवियों और ग्राफ़िक्स को सम्मिलित करके, उन्हें सटीक रूप से स्थापित करके अपने प्रकाशन को बेहतर बनाएं।

4. सामग्री को व्यवस्थित करना और प्रारूपित करना: अपनी सामग्री को सौंदर्य की दृष्टि से मनभावन तरीके से व्यवस्थित और प्रारूपित करने के लिए पेजमेकर के लेआउट टूल का उपयोग करें।

5. टेम्पलेट्स के साथ काम करना: पूर्व-डिज़ाइन किए गए टेम्पलेट्स का उपयोग करें या समय बचाने के लिए और अपने पूरे प्रकाशन में स्थिरता बनाए रखने के लिए अपना स्वयं का बनाएं।

6. शैलियाँ लागू करना और स्वरूपण: एक सुसंगत रूप और अनुभव सुनिश्चित करने के लिए सुसंगत शैलियों और स्वरूपण विकल्पों को लागू करें।

7. पृष्ठ और लेआउट प्रबंधित करना: अपने प्रकाशन को पृष्ठों को प्रबंधित करके व्यवस्थित करें, जिसमें उन्हें जोड़ना, हटाना और पुनर्व्यवस्थित करना शामिल है।

8. समीक्षा और प्रूफरीडिंग: अपने प्रकाशन की पूरी तरह से समीक्षा करें, त्रुटियों, टाइपोस और स्वरूपण विसंगतियों की जाँच करें।

9. निर्यात और मुद्रण: अंत में, अपने प्रकाशन को वांछित प्रारूप में निर्यात करें, चाहे प्रिंट या डिजिटल वितरण के लिए, और सुनिश्चित करें कि उचित मुद्रण सेटिंग्स लागू की गई हैं।

Tips for Efficient Publication Workflow
To optimize your workflow in PageMaker, consider the following tips:

1. Plan and Outline: Before diving into the software, create a clear plan and outline for your publication.

2. Organize Files: Keep your files organized, including text, images, and graphics, to easily locate and update them.

3. Use Keyboard Shortcuts: Familiarize yourself with keyboard shortcuts to speed up your work and navigate through PageMaker efficiently.

4. Utilize Master Pages: Set up master pages to maintain consistent design elements throughout your publication.

5. Backup and Save Versions: Regularly save your work and create backup copies to prevent data loss.

कुशल प्रकाशन वर्कफ़्लो के लिए युक्तियाँ:-

पेजमेकर में अपने कार्यप्रवाह को अनुकूलित करने के लिए, निम्नलिखित युक्तियों पर विचार करें:

1. योजना और रूपरेखा: सॉफ़्टवेयर में गोता लगाने से पहले, अपने प्रकाशन के लिए एक स्पष्ट योजना और रूपरेखा तैयार करें।

2. फाइलों को व्यवस्थित करें: अपनी फाइलों को आसानी से खोजने और अपडेट करने के लिए टेक्स्ट, इमेज और ग्राफिक्स सहित उन्हें व्यवस्थित रखें।

3. कीबोर्ड शॉर्टकट का उपयोग करें: अपने काम को तेज करने और पेजमेकर के माध्यम से कुशलतापूर्वक नेविगेट करने के लिए कीबोर्ड शॉर्टकट से खुद को परिचित करें।

4. मास्‍टर पृष्‍ठों का उपयोग करें: अपने पूरे प्रकाशन में सुसंगत डिजाइन तत्‍वों को बनाए रखने के लिए मास्‍टर पृष्‍ठों को सेट करें।

5. बैकअप और सेव वर्जन: नियमित रूप से अपने काम को सेव करें और डेटा हानि को रोकने के लिए बैकअप प्रतियां बनाएं।

1. Opening a Publication:

- Launch PageMaker on your computer.

- Go to the "File" menu and select "Open."

- Browse your computer to locate the publication file you want to open.

- Select the file and click "Open."

1. प्रकाशन खोलना:

- अपने कंप्यूटर पर पेजमेकर लॉन्च करें।

- "फ़ाइल" मेनू पर जाएं और "खोलें" चुनें।

- आप जिस प्रकाशन फ़ाइल को खोलना चाहते हैं, उसका पता लगाने के लिए अपने कंप्यूटर को ब्राउज़ करें।

- फ़ाइल का चयन करें और "खोलें" पर क्लिक करें।

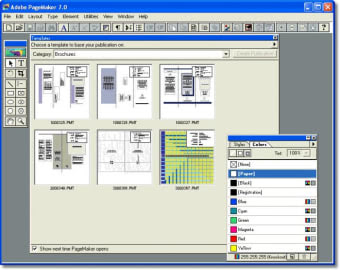
2. Creating a New Document:

- Open PageMaker on your computer.

- Go to the "File" menu and select "New."

- A dialog box will appear, allowing you to specify the document settings.

- Set the desired page size, margins, and other parameters as needed.

- Click "OK" to create a new document.

2. एक नया दस्तावेज़ बनाना:

- अपने कंप्यूटर पर पेजमेकर खोलें।

- "फ़ाइल" मेनू पर जाएं और "नया" चुनें।

- एक डायलॉग बॉक्स दिखाई देगा, जिससे आप दस्तावेज़ सेटिंग निर्दिष्ट कर सकते हैं।

- आवश्यकतानुसार वांछित पृष्ठ आकार, मार्जिन और अन्य पैरामीटर सेट करें।

- नया दस्तावेज़ बनाने के लिए "ओके" पर क्लिक करें।

3. Setting the Margins:

- Open your document in PageMaker.

- Go to the "Layout" menu and select "Margins."

- In the dialog box, enter the desired values for top, bottom, left, and right margins.

- Click "OK" to apply the changes.

3. मार्जिन सेट करना:

- पेजमेकर में अपना दस्तावेज़ खोलें।

- "लेआउट" मेनू पर जाएं और "मार्जिन" चुनें।

- संवाद बॉक्स में, ऊपर, नीचे, बाएँ और दाएँ मार्जिन के लिए वांछित मान दर्ज करें।

- परिवर्तनों को लागू करने के लिए "ओके" पर क्लिक करें।

4. Setting the Page Size:

- Open your document in PageMaker.

- Go to the "File" menu and select "Document Setup."

- In the dialog box, you can specify the desired page size by entering the width and height.

- Click "OK" to apply the changes.

4. पेज साइज सेट करना:

- पेजमेकर में अपना दस्तावेज़ खोलें।

- "फ़ाइल" मेनू पर जाएं और "दस्तावेज़ सेटअप" चुनें।

- संवाद बॉक्स में, आप चौड़ाई और ऊंचाई दर्ज करके वांछित पृष्ठ आकार निर्दिष्ट कर सकते हैं।

- परिवर्तनों को लागू करने के लिए "ओके" पर क्लिक करें।

5. Setting the Page Orientation:

- Open your document in PageMaker.

- Go to the "File" menu and select "Document Setup."

- In the dialog box, you will find options for setting the page orientation.

- Choose either "Portrait" (vertical) or "Landscape" (horizontal) as per your preference.

- Click "OK" to apply the changes.

5. पेज ओरिएंटेशन सेट करना:

- पेजमेकर में अपना दस्तावेज़ खोलें।

- "फ़ाइल" मेनू पर जाएं और "दस्तावेज़ सेटअप" चुनें।

- डायलॉग बॉक्स में आपको पेज ओरिएंटेशन सेट करने के विकल्प मिलेंगे।

- अपनी पसंद के अनुसार या तो "पोर्ट्रेट" (ऊर्ध्वाधर) या "लैंडस्केप" (क्षैतिज) चुनें।

- परिवर्तनों को लागू करने के लिए "ओके" पर क्लिक करें।

Example:-
Let's say you want to create a new document in PageMaker with a page size of A4, 1-inch margins on all sides, and landscape orientation. Here's how you would do it:

1. Open PageMaker.
2. Go to the "File" menu and select "New."
3. In the new document dialog box, set the page size to A4.
4. Specify 1-inch margins for top, bottom, left, and right.
5. Set the page orientation to landscape.
6. Click "OK" to create the new document.
Now you have a new PageMaker document with the specified page size, margins, and orientation ready for you to work with.

उदाहरण:-
मान लें कि आप पेजमेकर में A4 के पृष्ठ आकार, सभी तरफ 1-इंच मार्जिन और लैंडस्केप ओरिएंटेशन के साथ एक नया दस्तावेज़ बनाना चाहते हैं। यहां बताया गया है कि आप इसे कैसे करेंगे:

1. पेजमेकर खोलें।
2. "फ़ाइल" मेनू पर जाएं और "नया" चुनें।
3. नए दस्तावेज़ संवाद बॉक्स में, पृष्ठ आकार को A4 पर सेट करें।
4. ऊपर, नीचे, बाएँ और दाएँ के लिए 1-इंच मार्जिन निर्दिष्ट करें।
5. पेज ओरिएंटेशन को लैंडस्केप पर सेट करें।
6. नया दस्तावेज़ बनाने के लिए "ओके" पर क्लिक करें।
अब आपके पास काम करने के लिए निर्दिष्ट पृष्ठ आकार, मार्जिन और ओरिएंटेशन के साथ एक नया पेजमेकर दस्तावेज़ है।


Object Linking and Embedding, or OLE, is a technology developed by Microsoft that allows users to create composite documents by embedding or linking them from one application to another. OLE enables applications to share data and functionality, allowing users to create more complex and integrated documents. There are two main ways to use OLE: embedding and linking.
ऑब्जेक्ट लिंकिंग और एंबेडिंग, या OLE, Microsoft द्वारा विकसित एक तकनीक है जो उपयोगकर्ताओं को एक एप्लिकेशन से दूसरे एप्लिकेशन में एम्बेड या लिंक करके मिश्रित दस्तावेज़ बनाने की अनुमति देती है। OLE अनुप्रयोगों को डेटा और कार्यक्षमता साझा करने में सक्षम बनाता है, जिससे उपयोगकर्ता अधिक जटिल और एकीकृत दस्तावेज़ बना सकते हैं। OLE का उपयोग करने के दो मुख्य तरीके हैं: एम्बेडिंग और लिंकिंग। 

When you embed an object, you create a copy of the object in the document. This means that the object becomes part of the document, and you can manipulate it directly in the application you're working with. For example, you can embed a chart created in Excel in a Word document. You can then edit the chart in the Word document, and any changes you make will only affect the chart in that document.
जब आप कोई ऑब्जेक्ट एम्बेड करते हैं, तो आप दस्तावेज़ में ऑब्जेक्ट की एक प्रति बनाते हैं। इसका मतलब यह है कि ऑब्जेक्ट दस्तावेज़ का हिस्सा बन जाता है, और आप जिस एप्लिकेशन में काम कर रहे हैं, उसमें सीधे हेरफेर कर सकते हैं। उदाहरण के लिए, आप Word दस्तावेज़ में Excel में बनाए गए चार्ट को एम्बेड कर सकते हैं। फिर आप Word दस्तावेज़ में चार्ट को संपादित कर सकते हैं, और आपके द्वारा किया गया कोई भी परिवर्तन केवल उस दस्तावेज़ के चार्ट को प्रभावित करेगा। 

When you link an object, you create a reference to the object rather than embedding a copy of it. This means that any changes made to the object in the original application will be reflected in the document that contains the link. For example, you can link a chart created in Excel to a Word document. If you later make changes to the chart in Excel, those changes will be reflected in the chart in the Word document.
जब आप किसी ऑब्जेक्ट को लिंक करते हैं, तो आप ऑब्जेक्ट की प्रतिलिपि एम्बेड करने के बजाय उसका संदर्भ बनाते हैं। इसका मतलब है कि मूल एप्लिकेशन में ऑब्जेक्ट में किए गए कोई भी बदलाव उस दस्तावेज़ में दिखाई देंगे जिसमें लिंक है। उदाहरण के लिए, आप Word दस्तावेज़ में Excel में बनाए गए चार्ट को लिंक कर सकते हैं। यदि आप बाद में Excel में चार्ट में परिवर्तन करते हैं, तो वे परिवर्तन Word दस्तावेज़ के चार्ट में दिखाई देंगे। 

OLE also enables applications to share functionality. For example, you can embed a spreadsheet in a document, and then use a formula in the spreadsheet to calculate a value. The result of the calculation can then be displayed within the document, even if the calculation is performed in an embedded spreadsheet.
OLE अनुप्रयोगों को कार्यक्षमता साझा करने में भी सक्षम बनाता है। उदाहरण के लिए, आप किसी दस्तावेज़ में एक स्प्रेडशीट एम्बेड कर सकते हैं, और फिर एक मूल्य की गणना करने के लिए स्प्रेडशीट में एक सूत्र का उपयोग कर सकते हैं। गणना का परिणाम तब दस्तावेज़ के भीतर प्रदर्शित किया जा सकता है, भले ही गणना एम्बेडेड स्प्रेडशीट में की गई हो। 

OLE is used in many applications including Microsoft Office, Adobe Creative Suite, and Autodesk AutoCAD.It allows users to work more efficiently and effectively by enabling them to create complex documents containing objects and data from multiple sources.
OLE का उपयोग Microsoft Office, Adobe Creative Suite और Autodesk AutoCAD सहित कई अनुप्रयोगों में किया जाता है। यह उपयोगकर्ताओं को कई स्रोतों से वस्तुओं और डेटा वाले जटिल दस्तावेज़ बनाने में सक्षम बनाकर अधिक कुशलतापूर्वक और प्रभावी ढंग से काम करने की अनुमति देता है।

To set up an OLE (Object Linking and Embedding) linked object and embed an OLE object in PageMaker, you can follow these steps:-
OLE (ऑब्जेक्ट लिंकिंग एंड एंबेडिंग) लिंक्ड ऑब्जेक्ट सेट अप करने और पेजमेकर में OLE ऑब्जेक्ट एम्बेड करने के लिए, आप इन चरणों का पालन कर सकते हैं:-

Setting Up an OLE Linked Object:-
1. Open the document in PageMaker where you want to insert the OLE object.
2. Click on the "File" menu and select "Place" or "Import" to locate the file you want to link.
3. In the file selection dialog, browse to the file you want to link and select it.
4. Before clicking the "OK" or "Place" button, make sure to check the option that says "Link" or "Create Link." This will establish a dynamic link between the PageMaker document and the source file.
5. Click "OK" or "Place" to insert the linked OLE object into your PageMaker document.

एक OLE लिंक्ड ऑब्जेक्ट सेट अप करना:-

1. पेजमेकर में वह दस्तावेज़ खोलें जहाँ आप OLE ऑब्जेक्ट डालना चाहते हैं।
2. "फ़ाइल" मेनू पर क्लिक करें और जिस फ़ाइल को आप लिंक करना चाहते हैं उसका पता लगाने के लिए "स्थान" या "आयात करें" चुनें।
3. फ़ाइल चयन संवाद में, उस फ़ाइल को ब्राउज़ करें जिसे आप लिंक करना चाहते हैं और उसका चयन करें।
4. "ओके" या "प्लेस" बटन पर क्लिक करने से पहले, "लिंक" या "लिंक बनाएं" कहने वाले विकल्प को चेक करना सुनिश्चित करें। यह पेजमेकर दस्तावेज़ और स्रोत फ़ाइल के बीच एक गतिशील लिंक स्थापित करेगा।
5. अपने पेजमेकर दस्तावेज़ में लिंक किए गए OLE ऑब्जेक्ट को सम्मिलित करने के लिए "ओके" या "प्लेस" पर क्लिक करें।

Embedding an OLE Object:-

1. Open the document in PageMaker where you want to embed the OLE object.
2. Click on the "File" menu and select "Place" or "Import" to locate the file you want to embed.
3. In the file selection dialog, browse to the file you want to embed and select it.
4. Instead of checking the "Link" or "Create Link" option, ensure that it is unchecked. This will embed the OLE object directly into the PageMaker document.
5. Click "OK" or "Place" to insert the embedded OLE object into your PageMaker document.

एक OLE ऑब्जेक्ट एम्बेड करना:-

1. पेजमेकर में वह दस्तावेज़ खोलें जहाँ आप OLE ऑब्जेक्ट एम्बेड करना चाहते हैं।
2. "फ़ाइल" मेनू पर क्लिक करें और जिस फ़ाइल को आप एम्बेड करना चाहते हैं उसका पता लगाने के लिए "स्थान" या "आयात करें" चुनें।
3. फ़ाइल चयन संवाद में, उस फ़ाइल को ब्राउज़ करें जिसे आप एम्बेड करना चाहते हैं और उसका चयन करें।
4. "लिंक" या "लिंक बनाएं" विकल्प को चेक करने के बजाय, सुनिश्चित करें कि यह अनचेक है। यह OLE ऑब्जेक्ट को सीधे पेजमेकर दस्तावेज़ में एम्बेड कर देगा।
5. अपने पेजमेकर दस्तावेज़ में एम्बेडेड OLE ऑब्जेक्ट डालने के लिए "ओके" या "प्लेस" पर क्लिक करें।


Text Wrap is a feature in Adobe PageMaker that allows text to flow around a graphic or other object in a layout. Follow these steps to apply text wrap in PageMaker:-
टेक्स्ट रैप एडोब पेजमेकर में एक विशेषता है जो टेक्स्ट को लेआउट में ग्राफिक या अन्य ऑब्जेक्ट के चारों ओर प्रवाहित करने की अनुमति देता है। पेजमेकर में टेक्स्ट रैप लागू करने के लिए इन चरणों का पालन करें:-

1. Insert the object: First, insert the object around which you want the text to wrap by choosing "File" > "Place" from the menu and selecting the graphic file.
1. ऑब्जेक्ट डालें: सबसे पहले, मेनू से "फ़ाइल" > "प्लेस" चुनकर और ग्राफ़िक फ़ाइल चुनकर वह ऑब्जेक्ट डालें, जिसके चारों ओर आप टेक्स्ट लपेटना चाहते हैं। 

2. Select the object: With the object selected, choose the "Item" tool from the Toolbox. This will allow you to manipulate the object.
2. वस्तु का चयन करें: चयनित वस्तु के साथ, टूलबॉक्स से "आइटम" टूल चुनें। यह आपको वस्तु में हेरफेर करने की अनुमति देगा। 

3. Apply text wrap: In the "Item" menu, choose "Text Wrap". This will open the "Text Wrap" dialog box.
3. टेक्स्ट रैप लागू करें: "आइटम" मेनू में, "टेक्स्ट रैप" चुनें। यह "टेक्स्ट रैप" डायलॉग बॉक्स खोलेगा। 

4. Adjust text wrap options: In the "Text Wrap" dialog box, you can choose the type of text wrap you want to apply, such as "Wrap around bounding box" or "Wrap around object shape". You can also adjust other settings, such as the distance between the object and the text, the edge of the object around which to wrap the text, and the contour option for text wrap.
4. टेक्स्ट रैप विकल्पों को समायोजित करें: "टेक्स्ट रैप" डायलॉग बॉक्स में, आप जिस प्रकार के टेक्स्ट रैप को लागू करना चाहते हैं, उसे चुन सकते हैं, जैसे "रैप अराउंड बाउंडिंग बॉक्स" या "रैप अराउंड ऑब्जेक्ट शेप"। आप अन्य सेटिंग्स को भी एडजस्ट कर सकते हैं, जैसे ऑब्जेक्ट और टेक्स्ट के बीच की दूरी, टेक्स्ट को लपेटने के लिए ऑब्जेक्ट का किनारा, और टेक्स्ट रैप के लिए कंटूर विकल्प। 

5. Apply text wrap: After adjusting the text wrap options, click "OK" to apply the text wrap to the object.
5. टेक्स्ट रैप लागू करें: टेक्स्ट रैप विकल्पों को समायोजित करने के बाद, टेक्स्ट रैप को ऑब्जेक्ट पर लागू करने के लिए "ओके" पर क्लिक करें।

6. Place Text: With text wrap applied, you can now place text within the layout. The text will automatically flow around the object according to the text wrap settings.
6. प्लेस टेक्स्ट: टेक्स्ट रैप लागू होने के साथ, अब आप टेक्स्ट को लेआउट में रख सकते हैं। टेक्स्ट रैप सेटिंग्स के अनुसार टेक्स्ट स्वचालित रूप से ऑब्जेक्ट के चारों ओर प्रवाहित होगा। 

Be aware that text wrap can affect the layout and readability of your document. Experiment with different settings and preview layouts to make sure the text wrap works well with the rest of the design.
ध्यान रखें कि टेक्स्ट रैप आपके दस्तावेज़ के लेआउट और पठनीयता को प्रभावित कर सकता है। विभिन्न सेटिंग्स के साथ प्रयोग करें और यह सुनिश्चित करने के लिए लेआउट का पूर्वावलोकन करें कि टेक्स्ट रैप बाकी डिज़ाइन के साथ अच्छी तरह से काम करता है।

Data Link control Flow and Error Control

 In data communication, Data Link Control (DLC) refers to the services and protocols that ensure reliable and efficient communication betwee...